---
title: Trusted devices
description: By default, Elastic Defend policies have device control enabled, with access level set to block all operations. This prevents external storage devices...
url: https://docs-v3-preview.elastic.dev/elastic/docs-content/pull/6378/solutions/security/manage-elastic-defend/trusted-devices
products:
- Elastic Cloud Serverless
- Elastic Security
applies_to:
- Serverless Security projects: Generally available
- Elastic Stack: Generally available since 9.2
---
# Trusted devices
By default, Elastic Defend policies have [device control](/elastic/docs-content/pull/6378/solutions/security/configure-elastic-defend/configure-an-integration-policy-for-elastic-defend#device-control) enabled, with access level set to block all operations. This prevents external storage devices from connecting to protected hosts.
- Device control only affects external USB storage devices. It does not affect other peripherals such as Yubikeys, webcams, or keyboards.
- Device control only supports Windows and Mac endpoints.
Trusted devices are specific external devices that are allowed to connect to your protected hosts regardless of device control settings. Create trusted devices to avoid interfering with expected workflows that involve known hardware.
By default, a trusted device is recognized globally across all hosts running Elastic Defend. You can also assign a trusted device to a specific Elastic Defend integration policy, enabling the device to be trusted by only the hosts assigned to that policy.
## Add a trusted device
Add a trusted device to exempt it from device control:
1. Depending on your version, do one of the following:
- Elastic Cloud Serverless: Generally available Elastic Stack: Generally available since 9.4 Go to the **Artifacts** page using the navigation menu or the [global search field](https://docs-v3-preview.elastic.dev/elastic/docs-content/pull/6378/explore-analyze/find-and-organize/find-apps-and-objects), then select the **Trusted devices** tab.
- Elastic Stack: Generally available from 9.2 to 9.3 Go to the **Trusted Devices** page using the navigation menu or the global search field.
2. Click **+ Add trusted device**. The Add trusted device flyout opens.
3. Name your trusted device and give it a description.
4. In the **Conditions** section, specify the operating system(s) and the `Device ID`.
5. Select an option in the **Assignment** section:
- **Global**: Assign the trusted device to all Elastic Defend integration policies.
- **Per Policy**: Assign the trusted device to one or more specific Elastic Defend integration policies.
6. Click **Add trusted device**.
To add multiple trusted devices at once, you can import an NDJSON file instead. Refer to [Import and export trusted devices](#import-export-trusted-devices).
## View and manage trusted devices
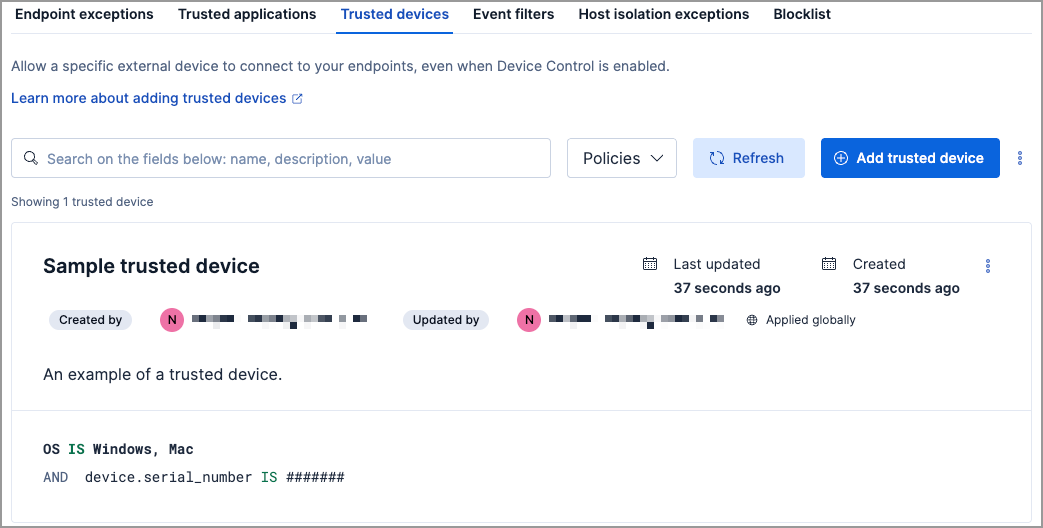
The **Trusted devices** UI displays all the trusted devices that have been added to the Elastic Security app. To refine the list, use the search bar to search by name, description, or field value.
### Import and export trusted devices
- Elastic Cloud Serverless: Generally available
- Elastic Stack: Generally available since 9.4
- To export trusted devices, you need the **Trusted Devices: Read** [privilege](https://docs-v3-preview.elastic.dev/elastic/docs-content/pull/6378/solutions/security/configure-elastic-defend/elastic-defend-feature-privileges).
- To import per-policy items, you need the **Trusted Devices: All** privilege.
- To import global items, you need the **Trusted Devices: All** and the **Global artifact management: All** privilege.
- To import items to a different space, you need the **Global artifact management: All** privilege.
You can import and export trusted devices as NDJSON files:
- **When the list is empty**: click **Import trusted devices**.
- **When the list has entries**: click the actions menu (`boxes_vertical`), then select **Import trusted devices** or **Export trusted devices**.
When you import an NDJSON file, the imported trusted devices are appended to your existing entries — existing entries are not removed or overwritten.
Items are processed individually on import — per-policy items that are not visible in the current space are skipped, while the remaining items are imported.
If an imported per-policy item is assigned to a policy that doesn't exist in the current environment, the item is imported with the policy assignment removed.
### Edit a trusted device
You can individually modify each trusted device. You can also change the policies that a trusted device is assigned to.
To edit a trusted device:
1. Click the actions menu (**…**) on the trusted device you want to edit, then select **Edit trusted device**.
2. Modify details as needed.
3. Click **Save**.
### Delete a trusted device
You can delete a trusted device, which removes it entirely from all Elastic Defend integration policies.
To delete a trusted device:
1. Click the actions menu (**…**) on the trusted device you want to delete, then select **Delete trusted device**.
2. On the dialog that opens, verify that you are removing the correct device, then click **Delete**. A confirmation message appears.