---
title: Microsoft Teams connector and action
description: The Microsoft Teams connector uses a webhook to send notifications. You can create connectors in Stack Management > Connectors or as needed when you’re...
url: https://docs-v3-preview.elastic.dev/elastic/kibana/pull/280898/reference/connectors-kibana/teams-action-type
products:
- Kibana
applies_to:
- Elastic Cloud Serverless: Generally available
- Elastic Stack: Generally available
---
# Microsoft Teams connector and action
The Microsoft Teams connector uses a webhook to send notifications.
## Create connectors in Kibana
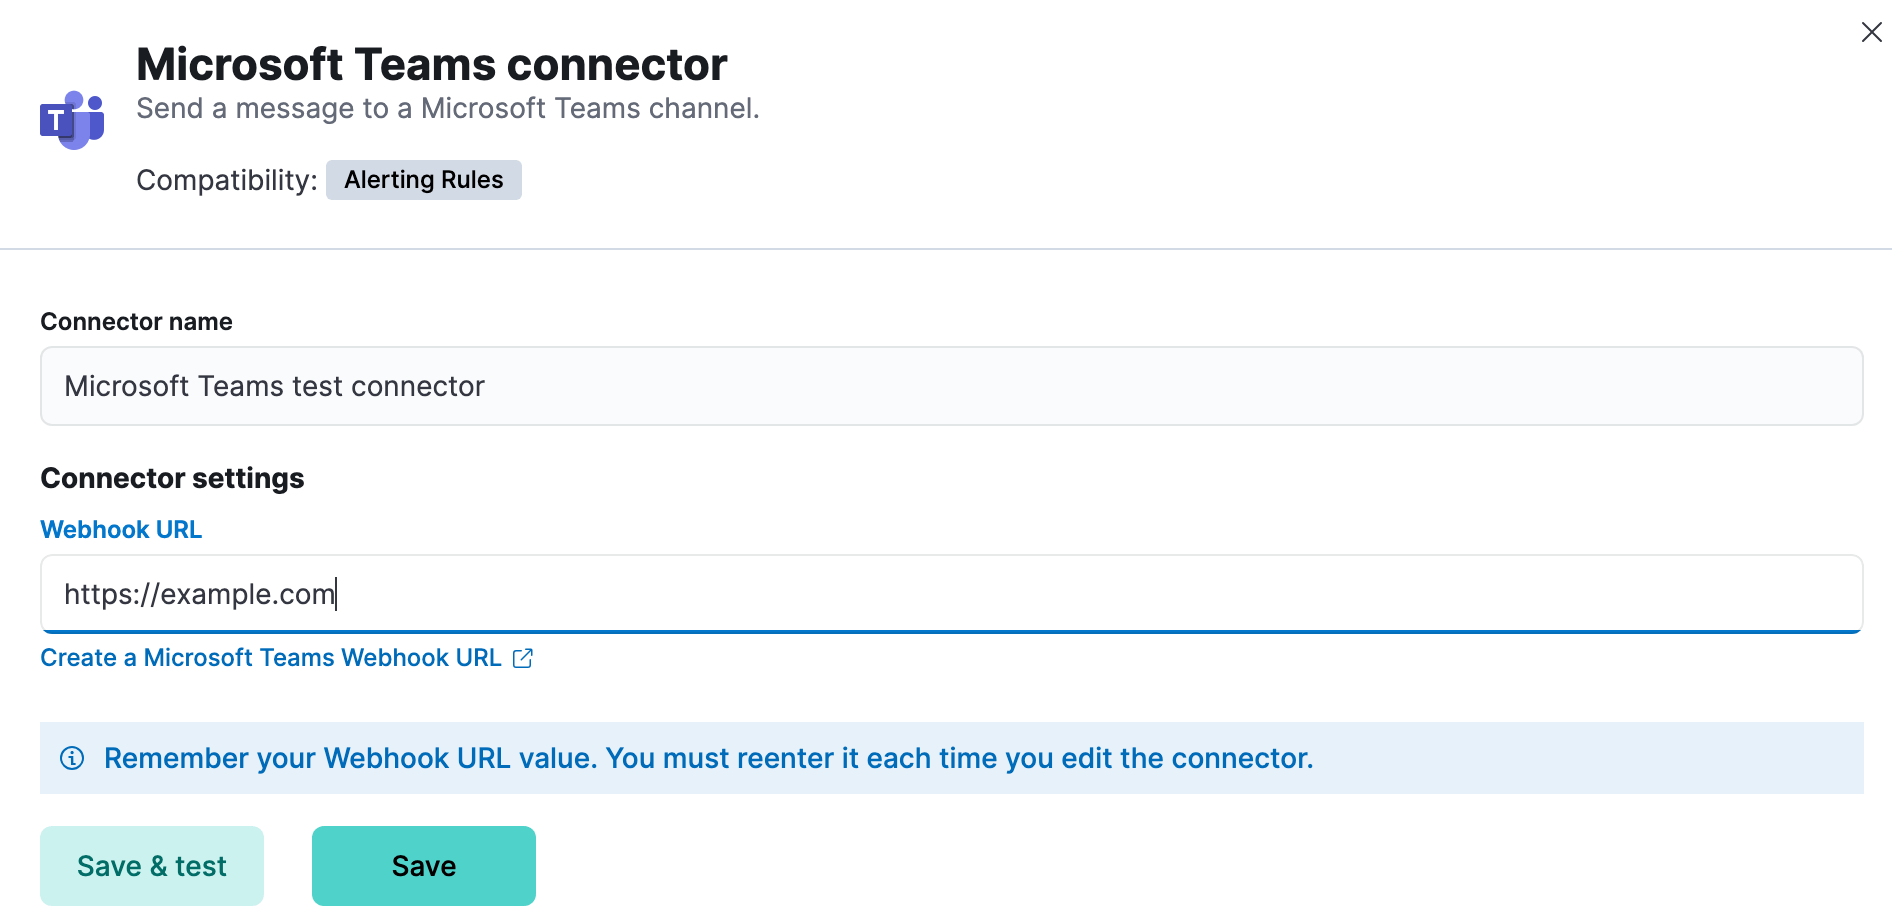
You can create connectors in **Stack Management > Connectors** or as needed when you’re creating a rule. For example:
### Connector configuration
Microsoft Teams connectors have the following configuration properties:
The name of the connector.
The URL of the incoming webhook. Refer to [Configure Microsoft Teams](#configuring-teams). If you are using the [`xpack.actions.allowedHosts`](/elastic/kibana/pull/280898/reference/configuration-reference/alerting-settings#action-settings) setting, make sure the hostname is added to the allowed hosts.
## Test connectors
You can test connectors as you’re creating or editing the connector in Kibana. For example:
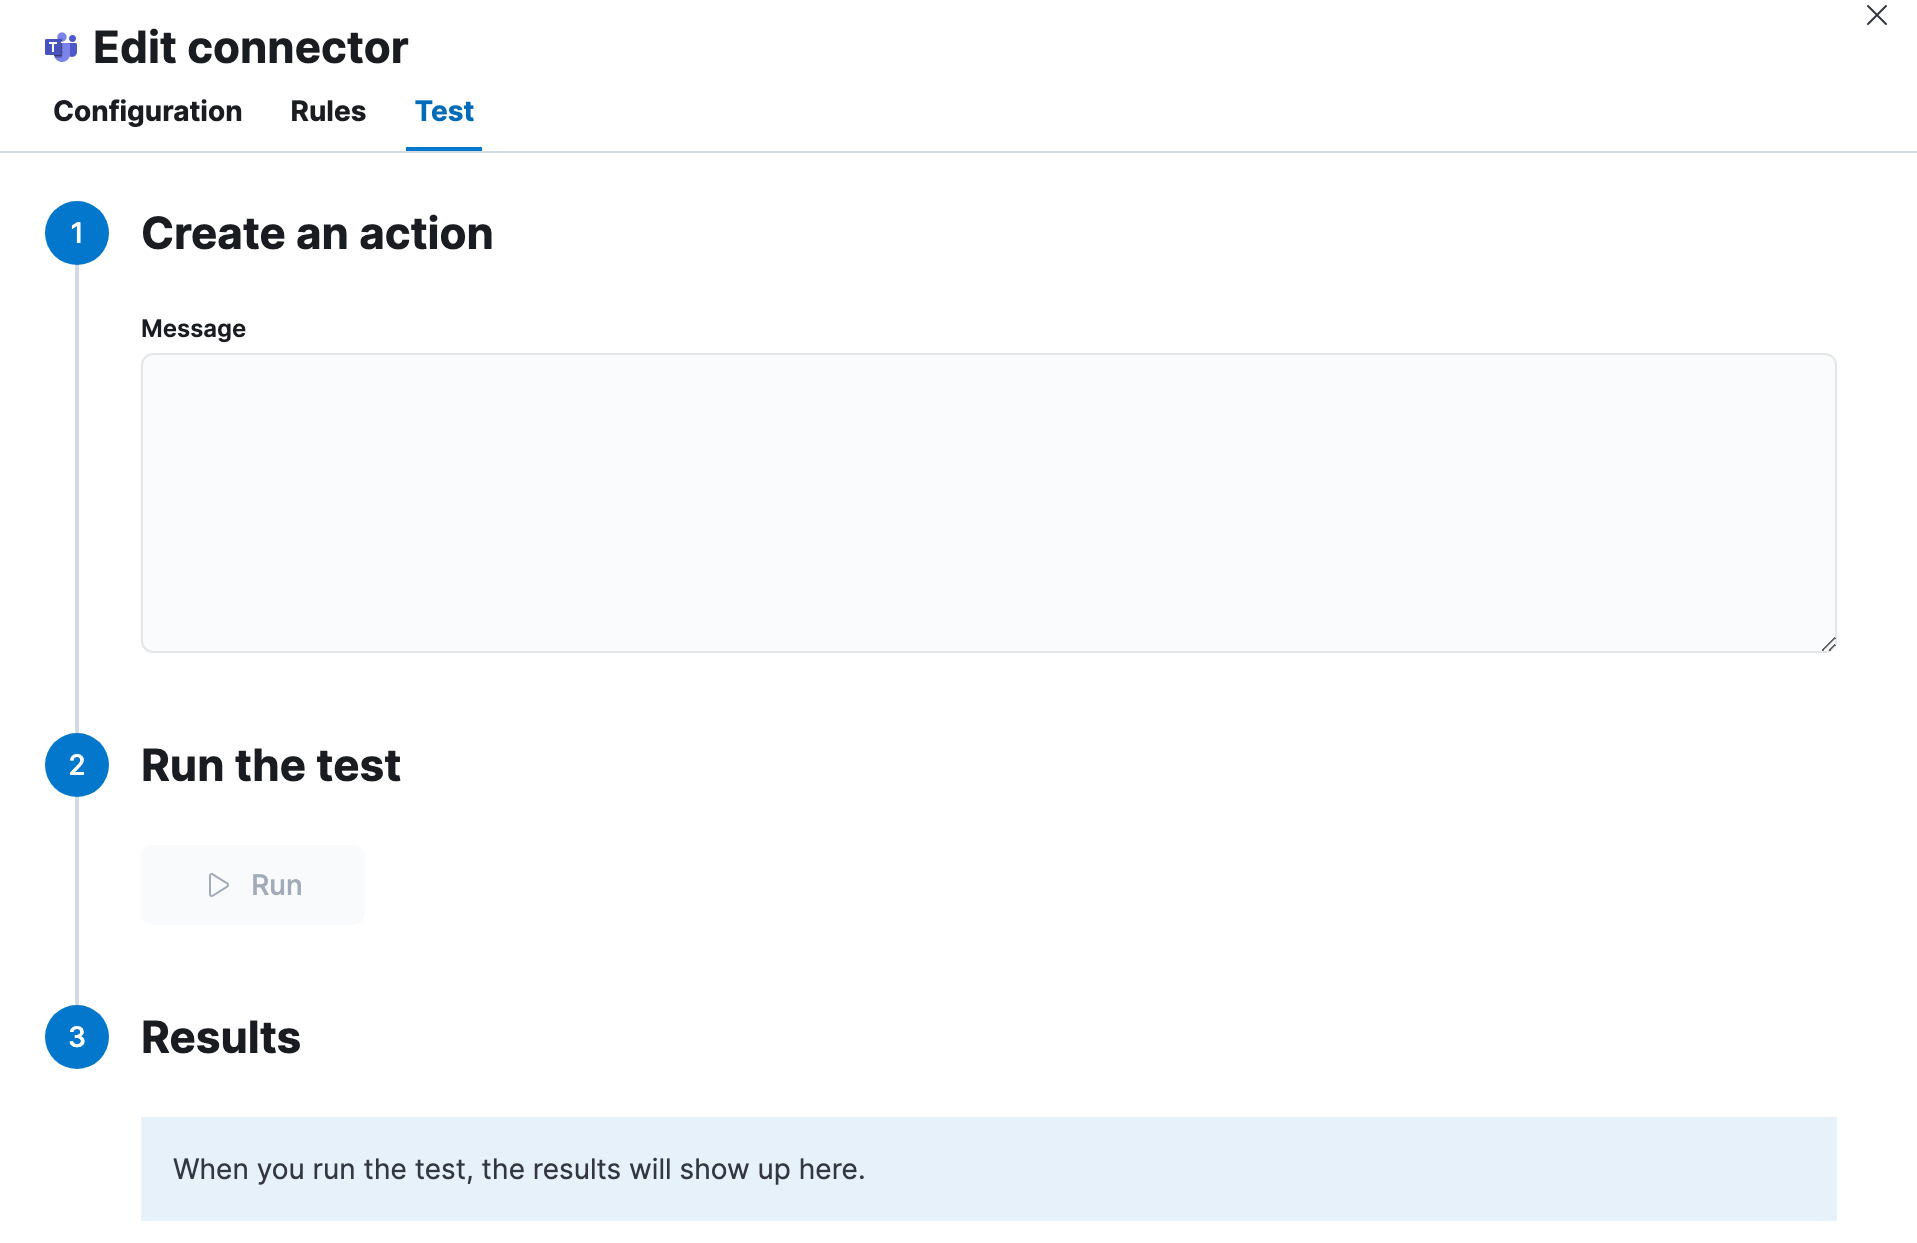
Microsoft Teams actions have the following properties.
The message text. Markdown, images, and other advanced formatting are not yet supported.
## Connector networking configuration
Use the [Action configuration settings](/elastic/kibana/pull/280898/reference/configuration-reference/alerting-settings#action-settings) to customize connector networking configurations, such as proxies, certificates, or TLS settings. You can set configurations that apply to all your connectors or use `xpack.actions.customHostSettings` to set per-host configurations.
## Configure Microsoft Teams
Microsoft 365 connectors are being [retired](https://devblogs.microsoft.com/microsoft365dev/retirement-of-office-365-connectors-within-microsoft-teams/); you must use the **Workflows** app to create a webhook URL. For example:
1. Go to the **Workflows** app in Teams and select the **Create** tab.
2. Create a workflow from a blank template.
You cannot use the "Post to a channel when a webhook request is received" template; it does not work with the Microsoft Teams connector.
3. Add a trigger as the first step in the workflow. Search for webhook triggers and select **When a Teams webhook request is received**. Set **Who can trigger the flow?** to `Anyone`.
4. Add **Post message in a chat or channel** as the second step in the workflow.
1. Set **Post as** to `Flow bot`.
If you want to post to a private group, set **Post as** to `User`. Note that the formatting might be affected.
2. Set **Post in** to `Channel`.
3. Set **Team** and **Channel** to the appropriate values for where you want the message displayed.
Per [[https://learn.microsoft.com/en-us/power-automate/teams/send-a-message-in-teams#known-issues-and-limitations](https://learn.microsoft.com/en-us/power-automate/teams/send-a-message-in-teams#known-issues-and-limitations)](https://learn.microsoft.com/en-us/power-automate/teams/send-a-message-in-teams#known-issues-and-limitations), you cannot use a private channel.
4. Set the **Message** to `@{triggerBody()?['text']}`.
Alternatively, you can add a **Parse JSON** step before the **Post message in a chat or channel** step in the workflow. Set the **Content** to `Body` and the **Schema** to the following value:
```json
{
"type": "object",
"properties": {
"text": {
"type": "string"
}
}
}
```
5. Save the workflow and copy the HTTP POST URL from the first step. This is the URL required by the Microsoft Teams connector.