Connectors in Elastic Agent Builder
The connectors library is hidden until you turn on the agentBuilder:experimentalFeatures advanced setting in Kibana.
The Elastic Agent Builder connectors library lets you configure action-based connectors that give agents access to external systems, such as messaging services, cloud functions, and third-party APIs.
Elastic Agent Builder connectors leverage the underlying Kibana Stack connectors framework to securely store credentials and manage integrations. However, they are distinct from Generative AI connectors, which are used exclusively to configure external LLM providers and are deprecated. Elastic Agent Builder connectors are not affected by that deprecation.
You manage connectors per Kibana space from Manage components → Connectors. Individual connector types in the catalog can be marked Technical preview.
connector-discovery skill, which Enable Elastic capabilities includes. To assign connectors, refer to Assign connectors to an agent.
When an agent needs to interact with an external system, it automatically reads the schemas of the connectors available to it. It then uses a built-in system tool (platform.core.execute_connector_sub_action) to independently format API payloads and run specific sub-actions (for example, looking up a Slack channel ID or searching AlienVault OTX for threat intelligence) without any manual tool mapping.
To register a new connector:
- In the sidebar, select Manage components → Connectors to open the Connectors library.
- Click Create connector.
- Select a connector type from the catalog.
- Provide the required configuration.
-
(Optional) If the form includes Actions, select Custom to limit which actions the connector can run. Refer to Limit a connector's actions. - Click Save.
The configured connector appears in the library.
Newer connector types, such as Gmail, Jira Cloud, and GitHub, include an Actions setting on the create and edit form when they define more than one action. Older connector types, such as Email, Jira, and ServiceNow ITSM, don't show it, even when they have several actions.
The setting applies everywhere the connector runs: in agents, workflows, and the Run a connector API. Kibana rejects calls to actions that the setting doesn't allow.
The Actions setting has two options:
- All
- The default. Allows every action, including actions added to the connector type in later versions.
- Custom
-
Allows only the actions you select. You must select at least one action.
When you first switch to Custom, the read actions are selected by default. You can change the selection.
Actions added to the connector type later stay unselected until you edit the connector and select them.
Each action has a scope badge: read, write, or destroy. Some actions also have a Workflow only badge. Agents can't run these actions, even when the connector allows them. The Run a connector API can run them, and so can workflows, for connector types available in workflows.
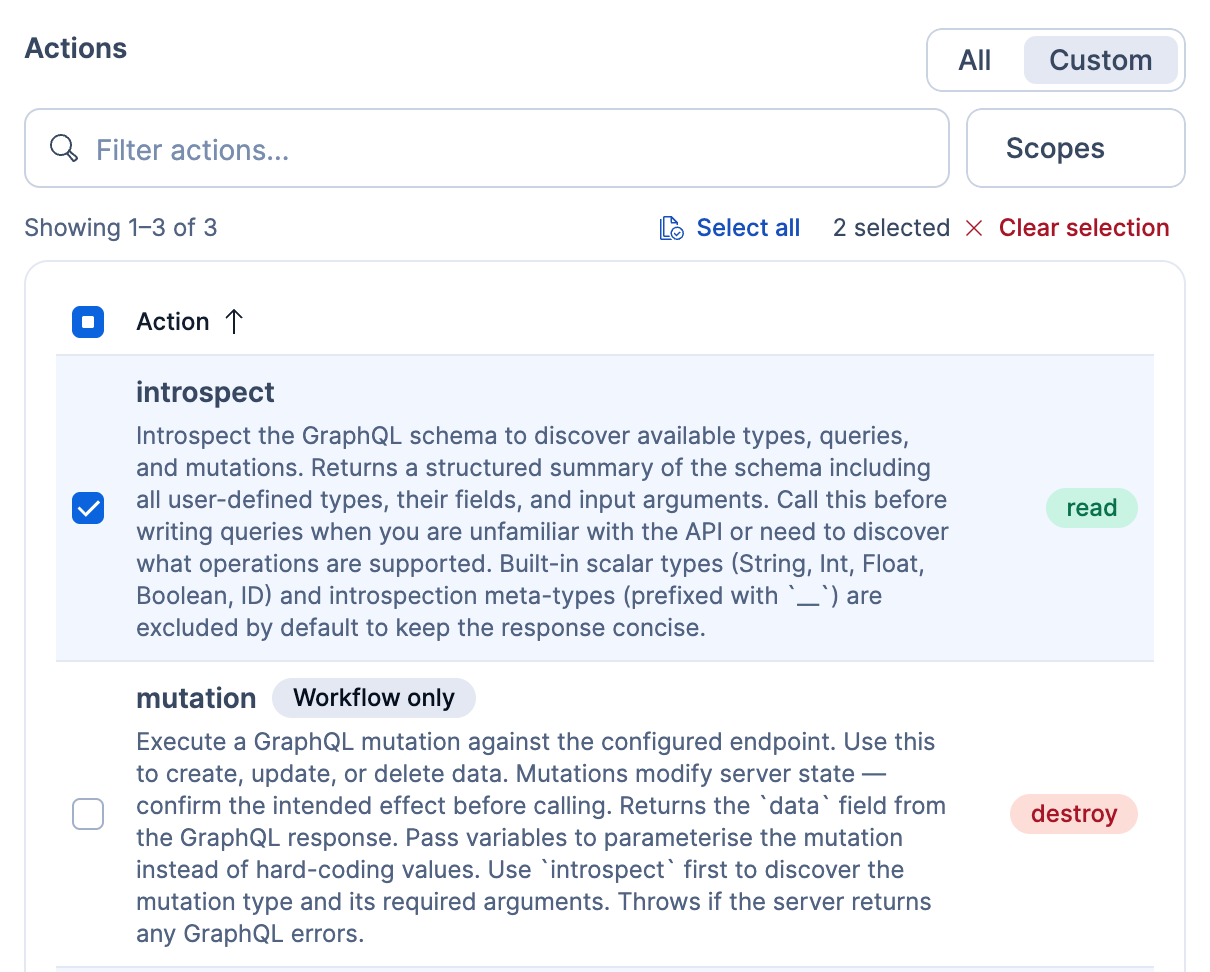
The following screenshot shows a GraphQL connector in Custom mode, with its read actions selected and a Workflow only action left unselected:
To change which actions an existing connector allows:
- In the sidebar, select Manage components → Connectors.
- In the Connectors library, click the connector name to open its edit form.
- Under Actions, select Custom.
- Select the actions to allow.
- Click Save.
The allowed actions are the same for every caller of the connector. To make an action with the write or destroy badge available to workflows but not to agents:
- Use a separate connector for workflows, and don't assign it to the agent.
- Don't give the agent a workflow tool that runs that workflow.
This works only for connector types available in workflows.
An agent can only use the connectors you assign to it, and new agents start with none. You assign connectors from the agent after you save it.
To assign connectors in Kibana, you need permission to edit the agent and the Actions and Connectors: All Kibana privilege. If Enable Elastic capabilities is off for the agent, also assign the built-in connector-discovery skill. Without it, the agent can't find its connectors.
To assign a connector to an agent:
- Select the agent. Then, in the sidebar under Customize, select Connectors.
- Select Add connector.
- Select one of the following:
- From library: Assign connectors that already exist in the connectors library.
- Create new connector: Configure a new connector. It's added to the library and assigned to the agent.
To unassign a connector, remove it from the agent's Connectors page. The connector stays in the library, and other agents it's assigned to can still use it.
Agents that were never assigned connectors can't use any. This includes:
- The built-in Elastic AI Agent.
- Agents created with the Agents API without
connector_ids. -
Agents created in 9.4 or 9.5 without a connector list. In those versions, these agents could use any connector. After you upgrade, assign connectors to them. -
Existing agents without a connector list, including agents created before new agents started with an empty list. Previously, these agents could use any connector. Assign connectors to them.
Agents that already had a connector list in 9.5 or on Serverless can now run only the connectors in that list. Previously, the list limited which connectors an agent could discover, not which ones it could run. Check these agents and assign any connectors they still need.
When an agent needs access to an OAuth connector, the chat pauses and displays an authorization prompt. Select Authorize to open the provider's sign-in flow in a new browser tab. After authorization succeeds, return to the chat, where the agent retries the connector call and continues. Select Deny to cancel the call.
If authorization fails or the provider does not return you to Kibana, close the provider tab and select Deny in the chat. Correct the connector or OAuth configuration, then retry your request. To learn more about this prompt, refer to Authorize a connector.