Manage credentials and privileges for ES|QL Data Federation
Because federated data lives outside Elasticsearch, connecting to a private store means Elasticsearch holds that data source's credentials and must control who can manage connections and read external data. This page covers credential encryption and masking, and the privilege model for data sources and datasets.
When a data source connects to a private bucket, its encrypted credentials are stored in the cluster state. Elasticsearch protects these credentials with encryption at rest and redaction in API responses.
When a data source includes credentials, Elasticsearch encrypts them using the cluster state encryption key before storing them in the cluster state.
The cluster state encryption key is available automatically in most environments, including Elastic Cloud Hosted, Elastic Cloud Enterprise, Elastic Cloud on Kubernetes, and Serverless.
By default, if the cluster state encryption key is not available when you create a data source, a PUT /_query/data_source request that includes credentials returns a 503 error.
On upgraded self-managed clusters, the encryption password is not configured automatically. To configure a cluster state encryption key, add cluster.state.encryption.password.<id> and cluster.state.encryption.active_password_id to the keystore on every node, then call POST /_nodes/reload_secure_settings.
Setting cluster.state.encryption.required: false lets a data source with credentials be created even when no encryption key is available. The credentials are then stored unencrypted in the cluster state, with only a warning in the logs. Keep the default unless you accept that risk.
Learn more about the cluster state encryption key.
All credential values are replaced by ::es_redacted:: in GET responses. Credentials are never returned in API responses.
A data source's credentials are masked when its definition is read back, and at query time the store is accessed using the data source's stored credentials.
These privileges control what users can do in Elasticsearch. What a data source can read in external storage is controlled by your cloud provider. Refer to grant read access to your data.
superuser has full access to data sources and datasets.
Dataset operations are authorized by the standard Elasticsearch index privileges, so a role that already administers or reads the matching index names covers datasets with no additional grant. Grant these index privileges on the dataset name:
| Operation | Privilege |
|---|---|
| Query a dataset | read |
| Create, read, or delete a dataset | manage or all |
| Dataset administration granted on its own | create_dataset, read_dataset_metadata, delete_dataset, manage_dataset |
The read privilege granted on a dataset name must not carry document-level or field-level security. FROM <dataset> is rejected if it does. The same restriction applies to ES|QL views.
Creating a dataset that references a data source also requires the read data source privilege for that data source. The two are authorized independently.
Data source operations require either the cluster manage (or all) privilege, which covers every data source, or fine-grained global.data_source privileges on specific data sources. Data source names in global.data_source accept wildcard patterns, such as acme_*, the same as index names in a role.
Each global.data_source privilege allows one operation, and manage allows all of them:
| Operation | global.data_source privilege |
|---|---|
| Create or replace a data source | create |
| Read a data source definition | read_metadata |
| Delete a data source | delete |
| Reference a data source from a dataset | read |
| All of the above | manage |
| Test a data source connection | None. Requires the cluster manage privilege. |
The ES|QL Data Federation UI in Kibana requires the cluster manage privilege. A role with only global.data_source privileges can manage data sources with the API, but not in the UI.
You can grant global.data_source privileges from the Kibana role editor:
- Find Roles in the navigation menu or use the global search field, then create or edit a role.
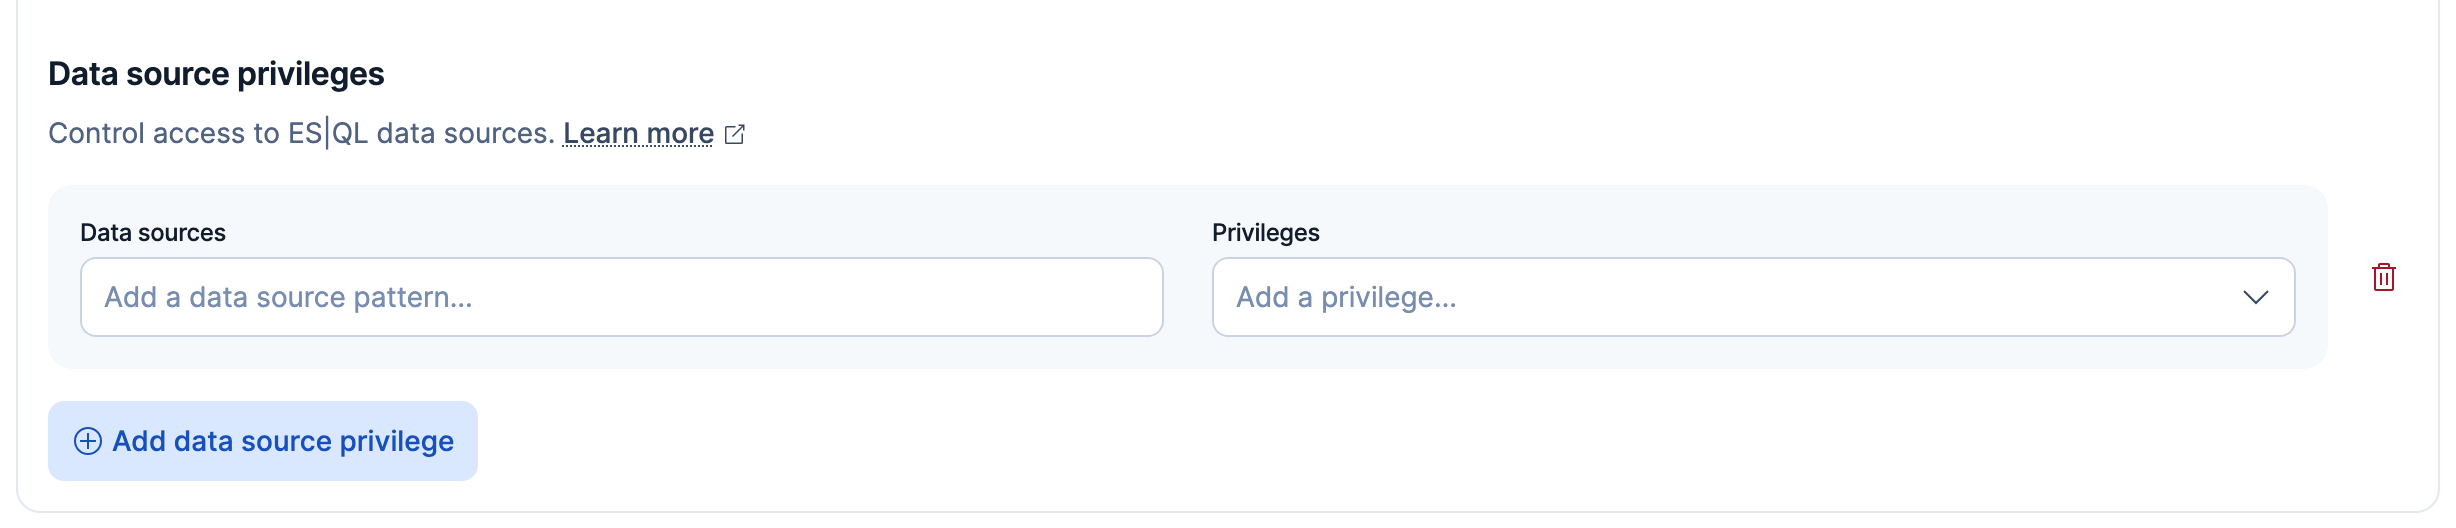
- Under Data source privileges, click Add data source privilege.
- In Data sources, enter the data source names or patterns, such as
acme_*. - In Privileges, select the privileges to grant.
The Data source privileges section appears with the other Elasticsearch privileges:
The following role grants querying sales and clicks, dataset administration over acme_*, and management of the acme_* data sources:
{
  "indices": [
    { "names": ["sales", "clicks"], "privileges": ["read"] },
    { "names": ["acme_*"], "privileges": ["manage"] }
  ],
  "global": {
    "data_source": [
      { "names": ["acme_*"], "privileges": ["manage"] }
    ]
  }
}
Continue with the following security and configuration tasks:
- To set up credentials for a data source, refer to connect with static credentials or connect with federated identity.
- For the operator-level setting that gates managed identity, refer to the authentication cluster settings.
- For the full Elasticsearch privilege reference, refer to security privileges.