Create and manage custom agents in Elastic Agent Builder
Custom agents enable you to create specialized AI assistants tailored to your specific use cases and workflows. Unlike built-in agents, which are pre-configured by Elastic, custom agents give you full control over instructions, tools, and behavior.
Built-in agents are immutable and cannot be edited. To customize agent behavior, you need to create a custom agent by cloning an agent or creating a new one from scratch. The Elastic AI Agent is an exception
Custom agents are space-aware: they are only available in the Kibana space where they were created. In contrast, built-in agents are available across all spaces.
A skill is available to help AI agents with this topic.
Follow these steps to create a new custom agent:
-
Navigate to the Agents page
Select Manage components at the bottom of the left sidebar, then select Agents.
TipYou can also reach this page from the agent selector: open the selector in the left sidebar and select New Agent.
Navigate to Agents in the main navigation.
-
Create a new agent
Select the New agent button to begin creating a new agent.

-
Configure essential settings
Configure the essential agent settings in the Settings tab:
Enter an Agent ID, a unique identifier for reference in code.
Add Custom instructions.
Custom instructions define the agent's personality and determine how it interacts with users and performs tasks.NoteAgent Builder adds your custom instructions to the system prompt to define the agent's behavior. The system prompt enables core features like visualization and citations.
Set the Display name for users.
Add a Display description to explain the agent's purpose.
-
Enable Elastic capabilities (optional)
Optionally enable the Enable Elastic capabilities toggle to automatically assign all Elastic-built tools, skills, and plugins to your agent. This toggle is disabled by default for custom agents.
For more information, refer to Elastic capabilities.
-
Configure pre-execution workflows (optional)
Administrators can assign workflows that run once after each user message, before the agent makes any LLM calls in response. Use pre-execution workflows to prepare prompt context or stop an agent run before the LLM starts.
For details, refer to Pre-execution workflows.
-
Set access control
Configure Access control for your agent in the Organization section. Access control determines who can view and edit the agent.
This setting is labeled Visibility. New agents get one of these levels by default:
-
Private: only you and administrators can view and edit the agent until you grant access to someone else. -
Public: anyone in the space can view and edit the agent.
For more information, refer to Access control settings. You can also configure per-agent access controls for more granular control.
-
-
Assign tools
Switch to the Tools tab to assign tools to your agent.
Select the combination of built-in and custom tools available to the agent, based on your use case.
-
Assign skills (optional)
Switch to the Skills tab to assign skills to your agent. Skills are reusable instruction sets that give the agent specialized expertise for particular types of tasks.
You can assign skills that already exist in your deployment's skill library—you create and manage those from Manage components > Skills—or you can create new skills inline from this tab. For an overview of skills, built-in versus custom skills, and APIs, refer to Skills in Elastic Agent Builder.
-
Assign plugins (optional)
Switch to the Plugins tab to assign plugins to your agent. Each plugin bundles a set of related skills into a single install. Before you can assign a plugin, install it from the global Plugins page in Manage components. For more information, refer to Plugins in Elastic Agent Builder.
NoteThe Plugins option is hidden until you turn on the
agentBuilder:experimentalFeaturesadvanced setting in Kibana. -
Customize appearance (optional)
Optionally customize the agent's appearance and organization:
- Add Labels to organize your agents.
- Select an Avatar color and Avatar symbol to help visually distinguish the agent.
-
Save your changes
Select Save to create your agent, or Save and chat to create the agent and immediately begin a conversation with it.

From the Agents page, you can perform various actions on custom agents:
- Chat: Start a conversation with the agent.
- Edit: Modify the agent's settings, instructions, tools, or appearance.
- Clone: Create a copy of the agent as a starting point for a new agent.
- Delete: Remove the agent from your workspace.
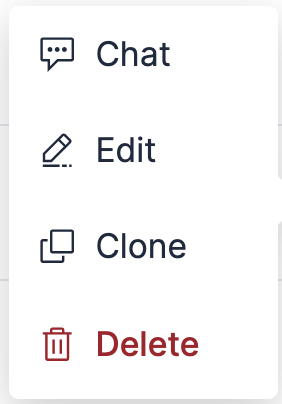
These management options apply only to custom agents and the Elastic AI Agent
Control who can view and edit your agent by configuring its access control level. To change the level, edit the agent and go to the Organization section.
Throughout this section, the owner is the user who created the agent, and an administrator is a user whose role grants wildcard (*) privileges, such as the built-in superuser role. Elastic Agent Builder privileges alone, including the privilege to manage agents in a space, don't make a user an administrator.
Every agent has one of three access control levels:
- Public
- Anyone can view and edit.
- Shared
-
Anyone can view. Only the owner or an administrator can edit.
People you grant access to can also edit. - Private
-
Only the owner or an administrator can view and edit.
People you grant access to can also view it, and edit it if you give them Editor or Manager.
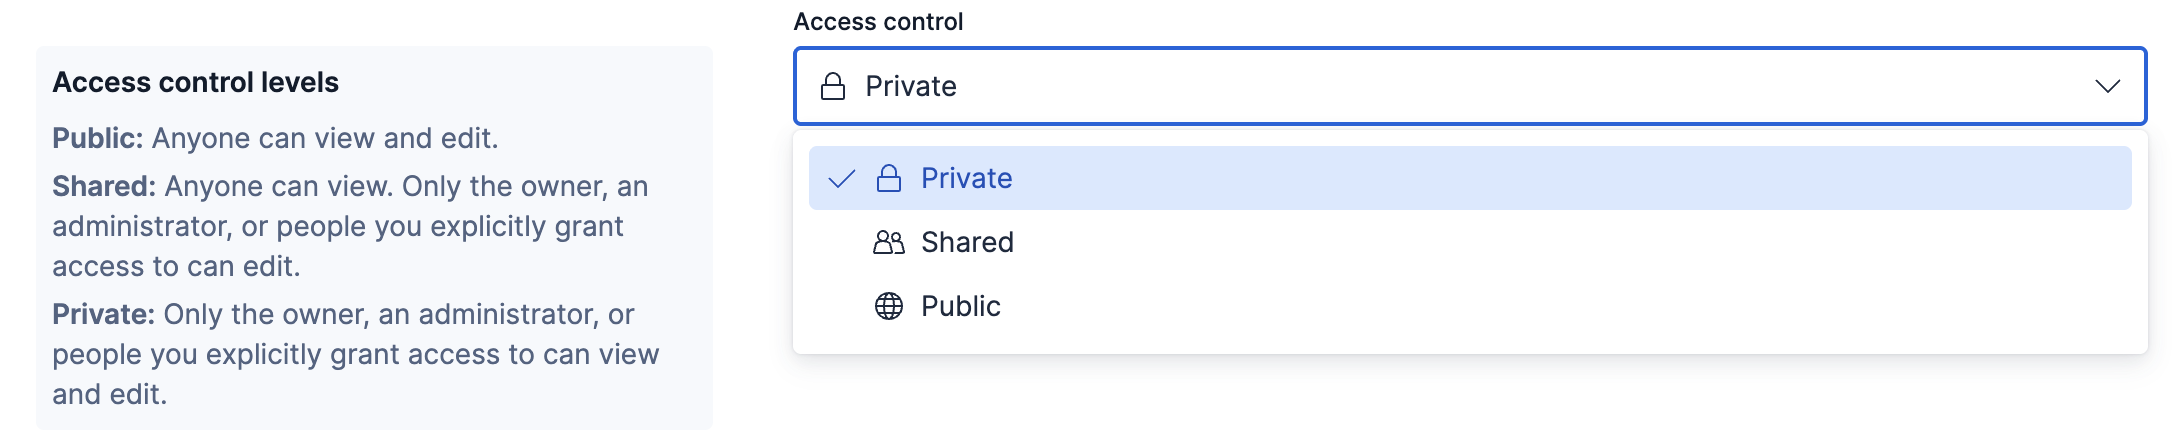
Whatever the level, only the owner or an administrator can change it. For everyone else, the setting is read-only.
Who can delete an agent:
-
The owner, an administrator, or a user you give Manager access. Being able to edit a Public agent doesn't include deleting it. -
Anyone who can edit the agent, which on a Public agent means anyone.
To grant access to individual users, refer to Per-agent access controls.
Most built-in agents don't have an access control level at all. They're always available to everyone who can use Elastic Agent Builder. The Elastic AI Agent is the exception: it does have a level, which is always Public and can't be changed, even by an administrator.
In addition to the three access control levels, you can grant individual users access to a specific agent. Use this when the agent's access control level is too broad or too narrow for a particular person.
To configure per-agent access controls:
- Edit the agent and go to the Organization section. You can also select Manage access for the agent on the Agents page.
- Select an access control level.
- Add individual users and assign each one an access level.
Each user you add gets one of three access levels. These are separate from the agent's access control level, which applies to everyone in the space:
- User
- Can find, view, and run the agent.
- Editor
- Everything a User can do, plus editing the agent's configuration.
- Manager
- Everything an Editor can do, plus deleting the agent and managing who has access to it.
Adding a user can only increase their access, never reduce it: they get whichever grants more, the level you assign or the agent's access control level. For example, you can set an agent to Private and then give one colleague Editor access.
You can grant per-agent access at any access control level, including Public. What changes is which levels you can assign: on Public and Shared agents, User isn't offered, because anyone in the space can already find and run the agent.
When creating custom agents, follow these best practices to ensure optimal performance and usability:
- Be specific and clear: Write instructions that clearly define the agent's role and capabilities.
- Define boundaries: Specify what the agent should and shouldn't do to prevent unexpected behavior.
- Include examples: Provide examples of how the agent should respond to common queries.
- Keep it focused: Agents with narrow, well-defined purposes typically perform better than generalist agents.
- Assign relevant tools only: Limit tools to those directly related to the agent's purpose.
- Fewer is better: Too many tools can confuse the agent's decision-making process.
- Test tool combinations: Verify that the selected tools work well together for your use case.
- Use descriptive names: Choose names that clearly convey the agent's purpose.
- Write meaningful descriptions: Help users understand when to use each agent.
- Apply labels consistently: Use labels to organize agents by team, use case, or department.
- Choose distinctive avatars: Select unique colors and symbols to make agents easily recognizable.
- Test thoroughly: Verify the agent works correctly with various queries before deploying.
- Iterate based on feedback: Refine instructions and tool assignments based on actual usage.
- Monitor performance: Track how well the agent addresses user needs and adjust as necessary.
The Agents API enables programmatic management of custom agents.
For an overview of agent API operations, refer to Agents API.
For the complete API reference, refer to the Kibana API reference.