Map external users and groups to roles
ECE ECK Elastic Cloud Hosted Self Managed
Role mapping is the process of applying roles to users based on their attributes or context. It is supported by all external realms (realms other than native and file).
To use role mapping, you create roles and role mapping rules. Role mapping rules can be based on realm name, realm type, username, groups, other user metadata, or combinations of those values.
Users with no roles assigned will be unauthorized for any action. In other words, they may be able to authenticate, but they will have no roles. No roles means no privileges, and no privileges means no authorizations to make requests.
You can map external users and groups to roles in the following ways:
- Using the Kibana Role mapping UI, which leverages the Role mapping API
- Using the Role mapping API
- Using role mapping files (PKI, LDAP, AD realms only)
When anonymous access is enabled, the roles of the anonymous user are assigned to all the other users as well.
All external realms also support delegated authorization. You can either map roles for a realm or use delegated authorization; you cannot use both simultaneously.
The native and file realms assign roles directly to users. Native realms use user management APIs. File realms use File-based role management.
Before you use role mappings to assign roles to users, the roles must exist. You can assign built-in roles, or custom roles defined through the UI, the API, or a roles file.
Any role mapping method can use any role management method. For example, when you use the role mapping API, you are able to map users to both API-managed roles (added using the UI or directly using the API) and file-managed roles. The same applies to file-based role-mappings.
You can use a combination of methods to map roles to users. If you create role mapping rules created through the API (and related UI), and create additional rules using a role mapping file, the rules are combined.
It’s possible for a single user to have some roles that were mapped through the UI or API, and others assigned based on the role mapping file.
You can define and manage role mappings through the add role mapping API.
To learn about the properties that you can include in a role mapping resource, refer to Role mapping resource properties.
Refer to Realm-specific details for examples of mapping roles using the API.
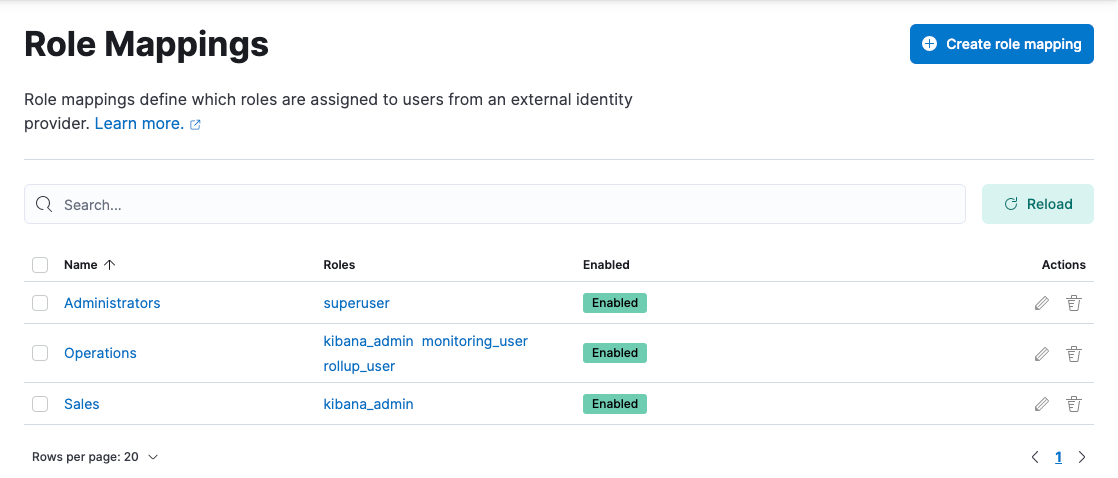
You can find the Role mappings management page using the navigation menu or the global search field.
With Role mappings, you can:
- View your configured role mappings
- Create, edit, or delete role mappings
The manage_security cluster privilege is required to manage role mappings.
Go to the Role mappings management page using the navigation menu or the global search field.
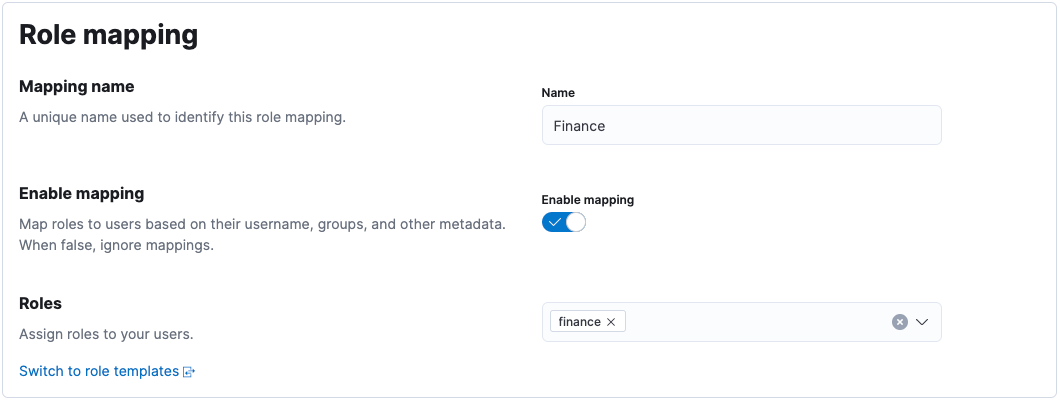
Click Create role mapping.
Give your role mapping a unique name, and choose which roles you want to assign to your users.
If you need more flexibility, you can use role templates instead.
Define the rules describing which users should receive the roles you defined. Rules can optionally grouped and nested, allowing for sophisticated logic to suite complex requirements.
View the role mapping resources for an overview of the allowed rule types.
Let’s create a sales-users role mapping, which assigns a sales role to users whose username starts with sls_, or belongs to the executive group.
- Give the role mapping a name, and assign the
salesrole:
- Define the two rules, making sure to set the group to Any are true:

- When you're finished defining rules, click Save role mapping.
While the role mapping API and UI are the preferred way to manage role mappings, using the role_mapping.yml file is useful in a few specific cases:
- If you want to define fixed role mappings that no one (besides an administrator with access to the Elasticsearch nodes or Elastic Cloud on Kubernetes cluster) would be able to change.
- If cluster administration depends on users from external realms, and these users need to have their roles mapped to them even when the cluster is RED. For instance, in the case of an administrator that authenticates using LDAP or PKI and gets assigned an administrator role so that they can perform corrective actions.
However, the role_mapping.yml file is provided as a minimal administrative function and is not intended to cover and be used to define roles for all use cases.
You can't view, edit, or remove any roles that are defined in the role mapping files by using role mapping APIs or the role mapping UI.
To use file based role mappings, you must configure the mappings in a YAML file.
To learn about the properties that you can include in a role mapping resource, refer to Role mapping resource properties.
Refer to Realm-specific details for examples of mapping roles using the role mapping file.
If you're using Elastic Cloud Enterprise or Elastic Cloud Hosted, then you must upload this file as a custom bundle before it can be referenced.
If you're using Elastic Cloud on Kubernetes, then install the file as a custom configuration file.
If you're using a self-managed cluster, then the file must be present on each node. Tools like Puppet or Chef can help with this.
By default, role mappings are stored in ES_PATH_CONF/role_mapping.yml. In self-managed clusters, ES_PATH_CONF is ES_HOME/config (zip/tar installations) or /etc/elasticsearch (package installations).
To specify a different location, you configure the files.role_mapping setting in the Active Directory, LDAP, and PKI realm settings in elasticsearch.yml.
Within the role mapping file, the security roles are keys and groups and users are values. The mappings can have a many-to-many relationship. When you map roles to groups, the roles of a user in that group are the combination of the roles assigned to that group and the roles assigned to that user.
By default, Elasticsearch checks role mapping files for changes every 5 seconds. If you're using a self-managed Elasticsearch cluster, you can change this default behavior by changing the resource.reload.interval.high setting in the elasticsearch.yml file. Because this is a common setting in Elasticsearch, changing its value might effect other schedules in the system.
Review the following examples to learn how to set up role mapping using the API and using role mapping files for a few common external realms.
To specify users and groups in the role mappings, you use their Distinguished Names (DNs). A DN is a string that uniquely identifies the user or group, for example "cn=John Doe,cn=contractors,dc=example,dc=com".
For example, the following examples map the admins group to the monitoring role and map the John Doe user, the users group, and the admins group to the user role.
The Elasticsearch security features support only Active Directory security groups. You can't map distribution groups to roles.
 PUT /_security/role_mapping/admins {
  "roles" : [ "monitoring", "user" ],
  "rules" : { "field" : { "groups" : "cn=admins,dc=example,dc=com" } },
  "enabled": true
}
 PUT /_security/role_mapping/basic_users {
  "roles" : [ "user" ],
  "rules" : { "any" : [
      { "field" : { "dn" : "cn=John Doe,cn=contractors,dc=example,dc=com" } },
      { "field" : { "groups" : "cn=users,dc=example,dc=com" } }
  ] },
  "enabled": true
}
monitoring: 1
  - "cn=admins,dc=example,dc=com" 2
user:
  - "cn=John Doe,cn=contractors,dc=example,dc=com" 3
  - "cn=users,dc=example,dc=com"
  - "cn=admins,dc=example,dc=com"
- The name of a role.
- The distinguished name of an LDAP group or an Active Directory security group.
- The distinguished name of an LDAP or Active Directory user.
PKI realms support mapping users to roles, but you can't map groups as the PKI realm has no concept of a group.
For example, the following examples map the Admin user to the monitoring role and map the John Doe user to the user role.
 PUT /_security/role_mapping/admin_user {
  "roles" : [ "monitoring" ],
  "rules" : { "field" : { "dn" : "cn=Admin,ou=example,o=com" } },
  "enabled": true
}
 PUT /_security/role_mapping/basic_user {
  "roles" : [ "user" ],
  "rules" : { "field" : { "dn" : "cn=John Doe,ou=example,o=com" } },
  "enabled": true
}
monitoring:
  - "cn=Admin,ou=example,o=com"
user:
  - "cn=John Doe,ou=example,o=com"