Set up SAML with Microsoft Entra ID
ECE ECK Elastic Cloud Hosted Self Managed
This guide provides a walk-through of how to configure Microsoft Entra ID, formerly known as Azure Active Directory, as an identity provider for SAML single sign-on (SSO) authentication, used for accessing Kibana in Elastic Cloud Hosted.
For more information about SAML configuration, refer to:
Follow these steps to configure SAML with Microsoft Entra ID as an identity provider to access Kibana.
Configure the Entra Identity Provider:
Log in to the Azure Portal and navigate to Entra (formerly Azure Active Directory).
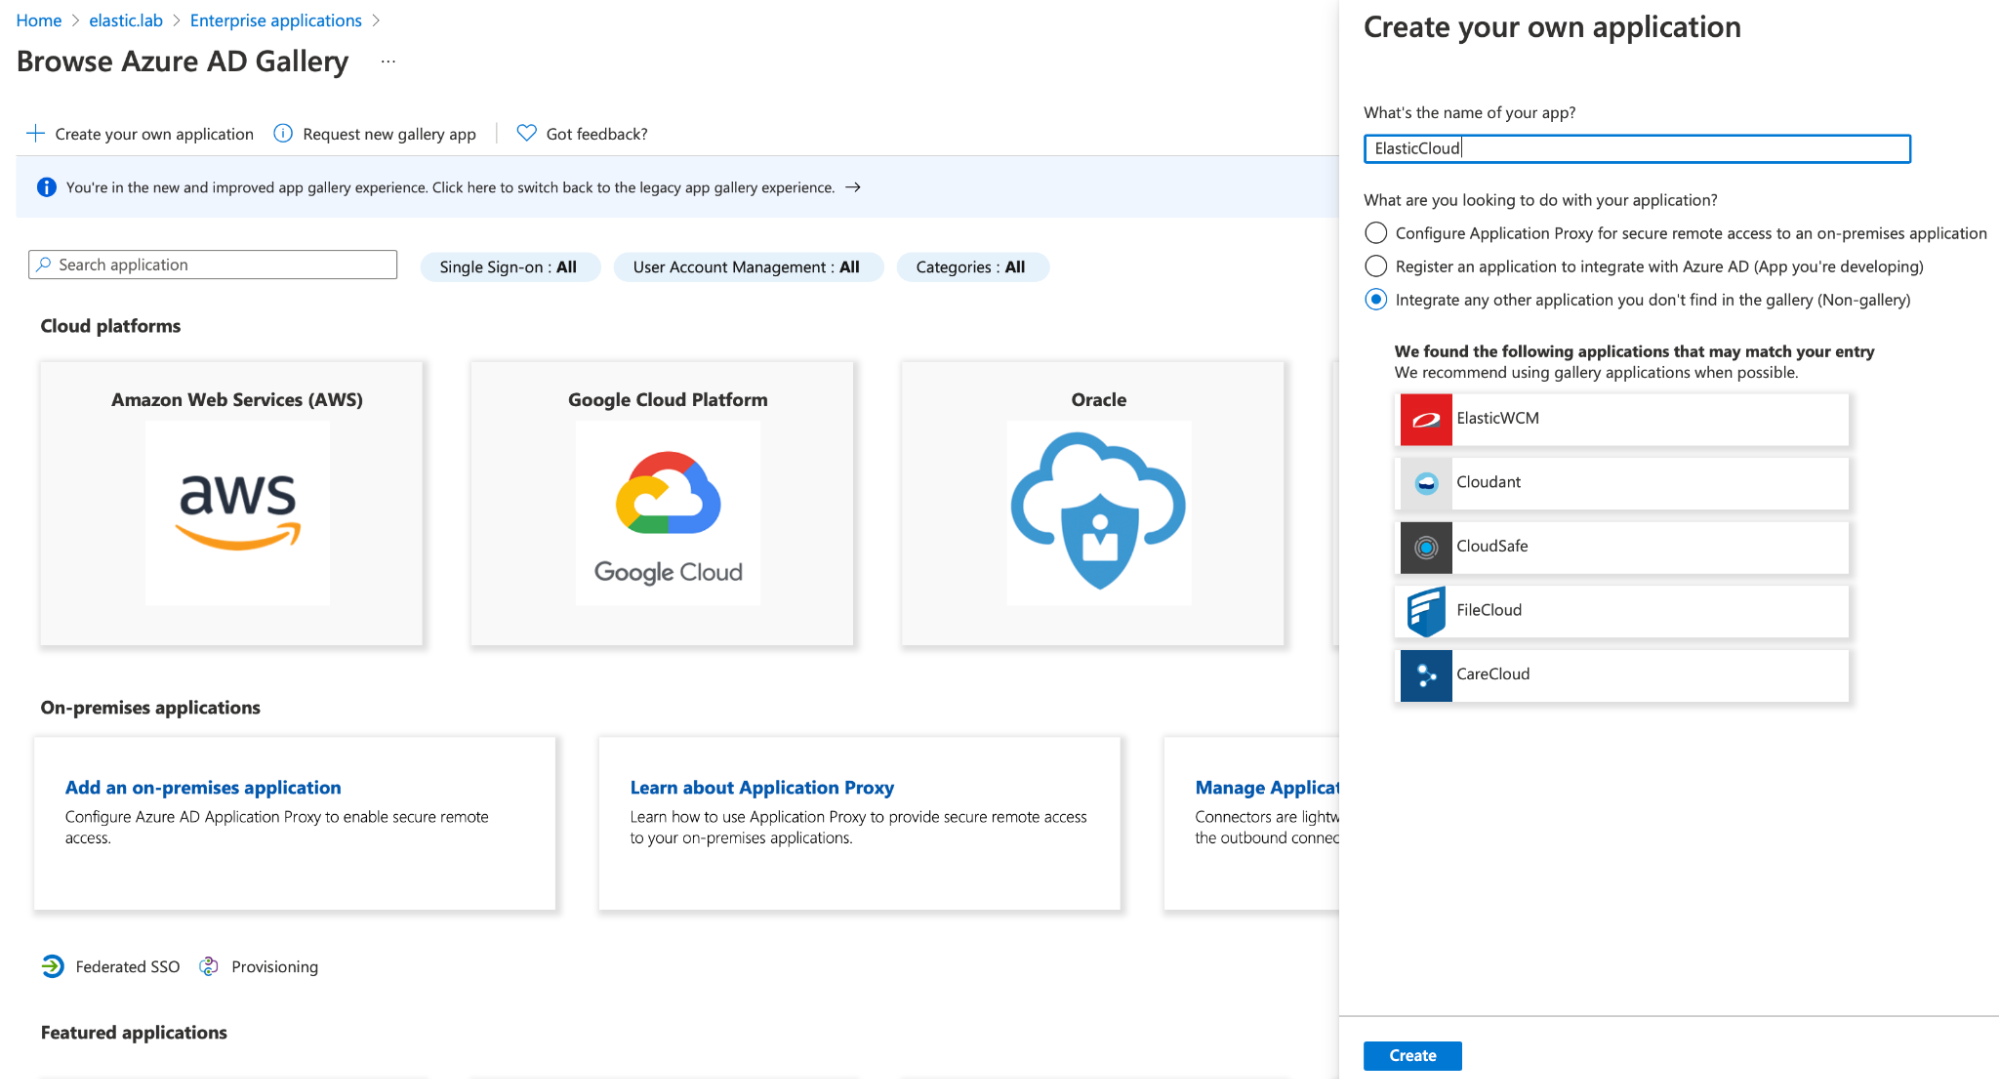
Click Enterprise applications and then New application to register a new application.
Click Create your own application, provide a name, and select the Integrate any other application you don’t find in the gallery option.
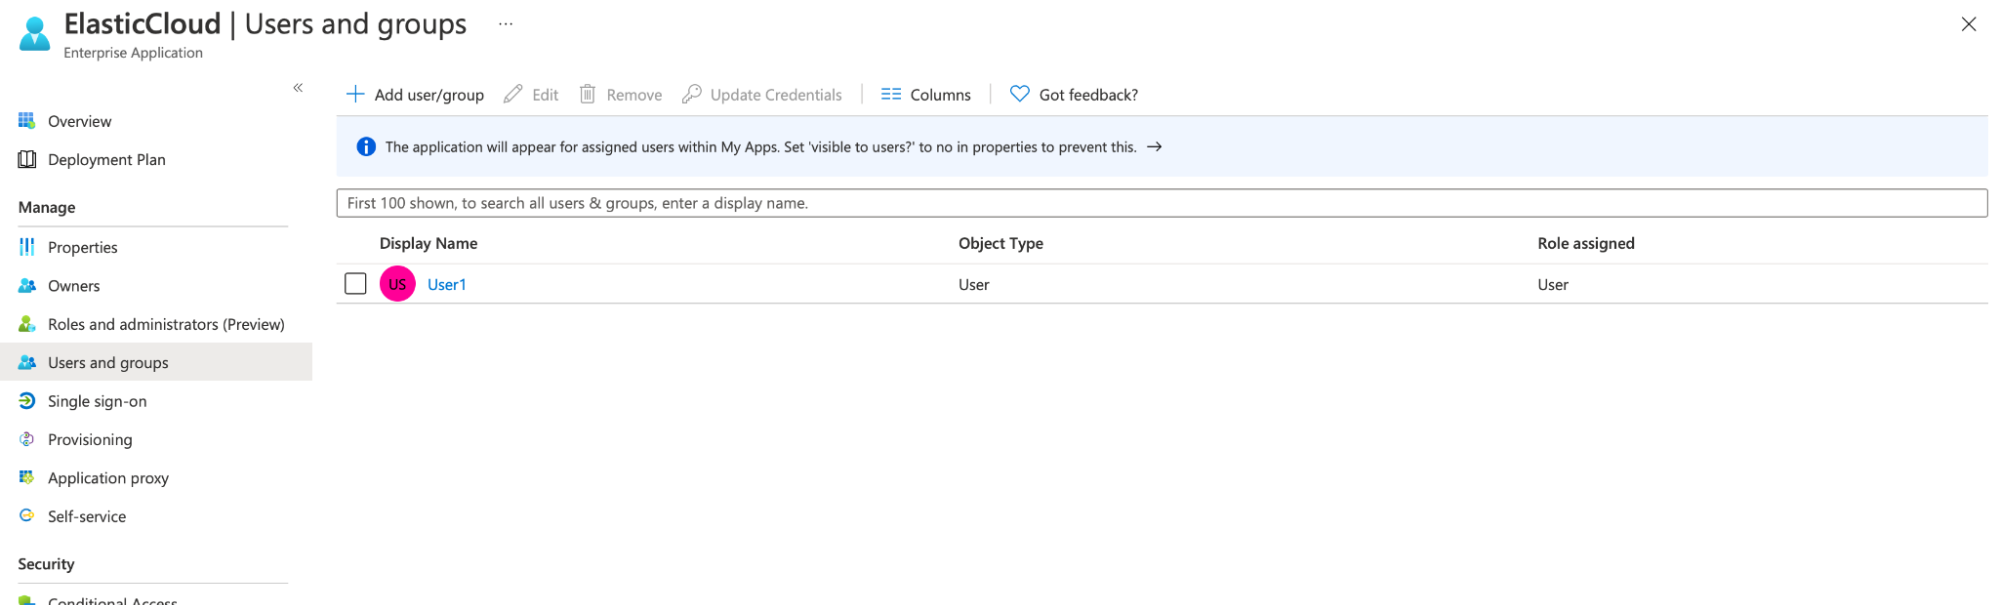
Navigate to the new application, click Users and groups, and add all necessary users and groups. Only the users and groups that you add here will have SSO access to the Elastic Stack.
Navigate to Single sign-on and edit the basic SAML configuration, adding the following information:
Identifier (Entity ID)- a string that uniquely identifies a SAML service provider. We recommend using your Kibana URL, but you can use any identifier.For example,
https://saml-azure.kb.northeurope.azure.elastic-cloud.com:443.Reply URL- This is the Kibana URL with/api/security/saml/callbackappended.For example,
https://saml-azure.kb.northeurope.azure.elastic-cloud.com:443/api/security/saml/callback.Logout URL- This is the Kibana URL with/logoutappended.For example,
https://saml-azure.kb.northeurope.azure.elastic-cloud.com:443/logout.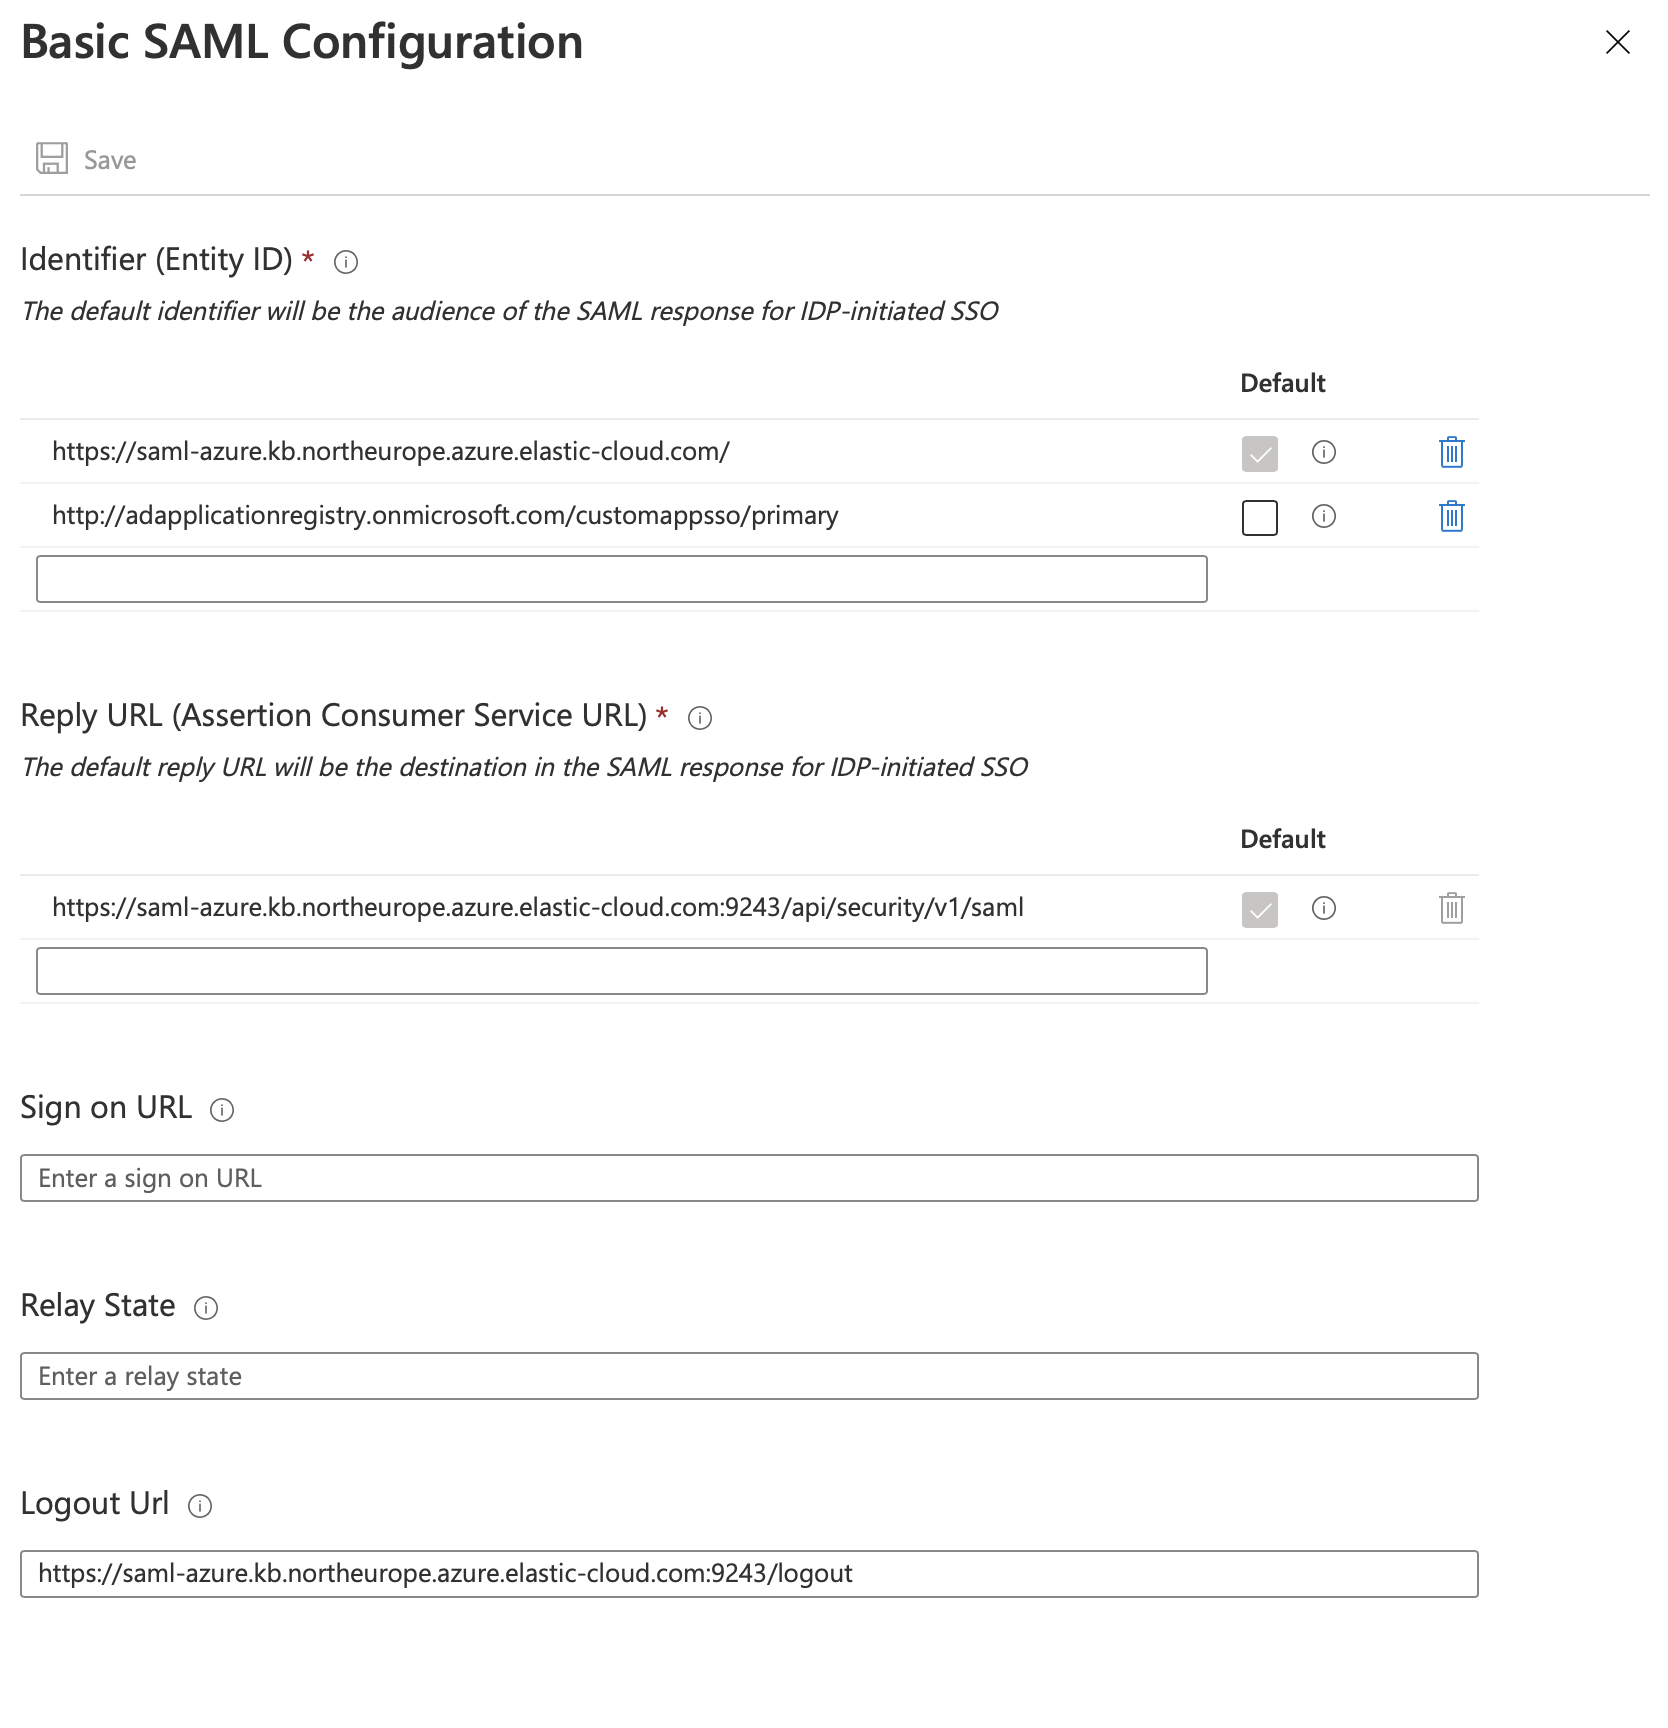
Navigate to SAML-based Single sign-on, open the User Attributes & Claims configuration, and update the fields to suit your needs. These settings control what information from will be made available to the Elastic Stack during SSO. This information can be used to identify a user in the Elastic Stack and/or to assign different roles to users in the Elastic Stack. We suggest that you configure a proper value for the
Unique User Identifier (Name ID)claim that identifies the user uniquely and is not prone to changes.
From the SAML configuration page, make a note of the
App Federation Metadata URL.
Configure Elasticsearch and Kibana for SAML:
Update your Elasticsearch user settings with the following configuration:
xpack.security.authc.realms.saml.kibana-realm:
  order: 2
  attributes.principal: nameid
  attributes.groups: "http://schemas.microsoft.com/ws/2008/06/identity/claims/groups"
  idp.metadata.path: "https://login.microsoftonline.com/<Tenant ID>/federationmetadata/2007-06/federationmetadata.xml?appid=<Application_ID>"
  idp.entity_id: "https://sts.windows.net/<Tenant_ID>/"
  sp.entity_id: "<Kibana_Endpoint_URL>"
  sp.acs: "<Kibana_Endpoint_URL>/api/security/saml/callback"
  sp.logout: "<Kibana_Endpoint_URL>/logout"
Where:
<Application_ID>is your Application ID, available in the application details in Azure.<Tenant_ID>is your Tenant ID, available in the tenant overview page in Azure.<Kibana_Endpoint_URL>is your Kibana endpoint, available from the Elastic Cloud Hosted console. Ensure this is the same value that you set forIdentifier (Entity ID)in the earlier Microsoft Entra ID configuration step.For
idp.metadata.path, we’ve shown the format to construct the URL. This value should be identical to theApp Federation Metadata URLsetting that you made a note of in the previous step.If you're using Elastic Cloud Enterprise or Elastic Cloud Hosted, and you're using machine learning or a deployment with hot-warm architecture, you must include this configuration in the user settings section for each node type.
Next, configure Kibana to enable SAML authentication:
Update your Kibana user settings with the following configuration:
xpack.security.authc.providers:
  saml.kibana-realm:
    order: 0
    realm: kibana-realm
    description: "Log in with Microsoft Entra ID"
The configuration values used in the example above are:
xpack.security.authc.providers- Add
samlprovider to instruct Kibana to use SAML SSO as the authentication method. xpack.security.authc.providers.saml.<provider-name>.realm-
Set this to the name of the SAML realm that you have used in your Elasticsearch realm configuration. For this example, use the realm name that you configured in the previous step:
kibana-realm.
Create a role mapping.
The following role mapping for SAML SSO restricts access to a specific user
(email)based on theattributes.principalemail address. This prevents other users on the same domain from having access to your deployment. You can remove the rule or adjust it at your convenience.POST /_security/role_mapping/SAML_kibana { "enabled": true, "roles": [ "superuser" ], "rules" : { "all" : [ { "field" : { "realm.name" : "kibana-realm" } }, { "field" : { "username" : [ "<firstname.lastname>" ] } } ] }, "metadata": { "version": 1 } }For more information, refer to Configure role mapping in the Elasticsearch SAML documentation.
You should now have successfully configured SSO access to Kibana with Microsoft Entra ID as the identity provider.