Set up OpenID Connect with Azure, Google, or Okta
ECE ECK Elastic Cloud Hosted Self Managed
This page explains how to implement OIDC, from the OAuth client credentials generation to the realm configuration for Elasticsearch and Kibana, with the following OpenID Connect Providers (OPs):
For further detail about configuring OIDC, refer to OpenID Connect authentication
Follow these steps to configure OpenID Connect single sign-on on in Elasticsearch with an Azure OP.
For more information about OpenID connect in Azure, refer to Azure OAuth 2.0 and OpenID documentation.
Configure the OAuth client ID.
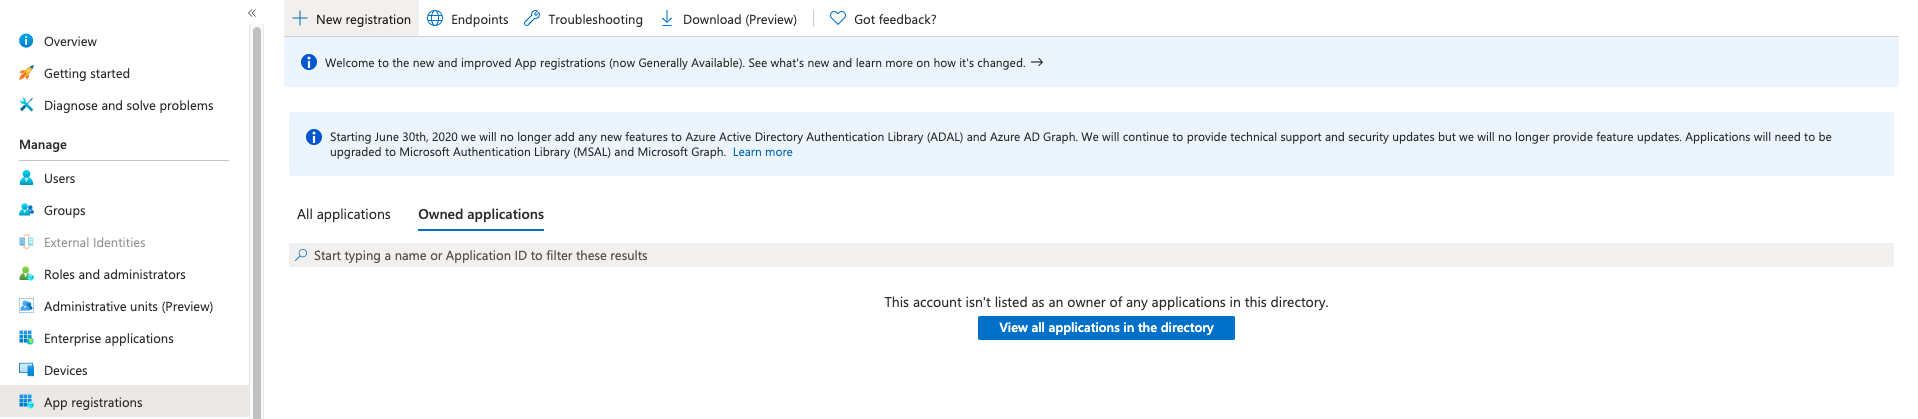
Create a new application:
Sign into the Azure Portal and go to Entra (formerly Azure Active Directory). From there, select App registrations > New registration to register a new application.
Enter a Name for your application, for example
ec-oauth2.Select a Supported Account Type according to your preferences.
Set the Redirect URI.
It will typically be
<KIBANA_ENDPOINT_URL>/api/security/oidc/callback, where<KIBANA_ENDPOINT_URL>is the base URL for your Kibana instance.If you're using Elastic Cloud Hosted, then set this value to
<KIBANA_ENDPOINT_URL>/api/security/oidc/callback.Select Register.
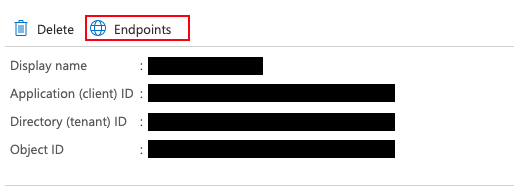
Confirm that your new Application (client) ID appears in the app details.
Create a client ID and secret:
From the application that you created, go to Certificates & secrets and create a new secret under Client secrets > New client secret.
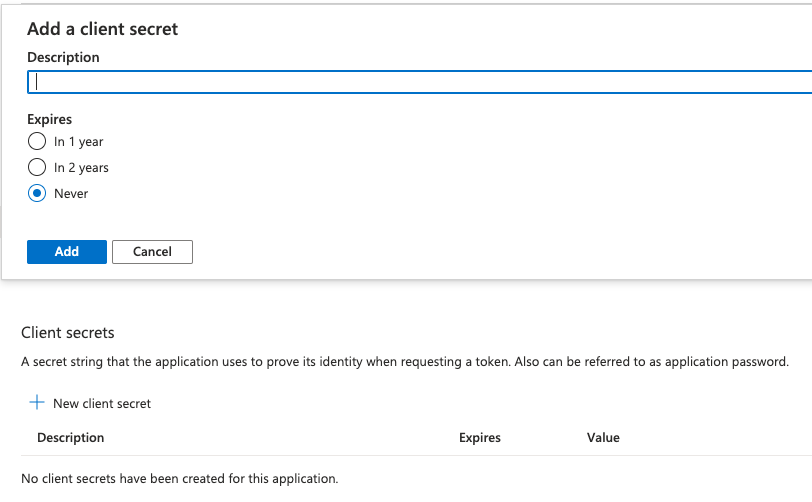
Provide a Description, for example
Kibana.Select an expiration for the secret.
Select Add and copy your newly created client secret for later use.
Add your client secret to the Elasticsearch keystore.
For OIDC, the client secret setting name in the keystore should be in the form
xpack.security.authc.realms.oidc.<oidc-realm-name>.rp.client_secret.Configure Elasticsearch with the OIDC realm.
To learn more about the available endpoints provided by Microsoft Azure, refer to the Endpoints details in the application that you configured.
To configure Elasticsearch for OIDC, update your Elasticsearch user settings with the following configuration:
xpack:
    security:
    authc:
        realms:
        oidc:
            oidc1:
            order: 2
            rp.client_id: "<Application (client) ID>"
            rp.response_type: "code"
            rp.requested_scopes: ["openid", "email"]
            rp.redirect_uri: "KIBANA_ENDPOINT_URL/api/security/oidc/callback"
            op.issuer: "https://login.microsoftonline.com/<Directory (tenant) ID>/v2.0"
            op.authorization_endpoint: "https://login.microsoftonline.com/<Directory (tenant) ID>/oauth2/v2.0/authorize"
            op.token_endpoint: "https://login.microsoftonline.com/<Directory (tenant) ID>/oauth2/v2.0/token"
            op.userinfo_endpoint: "https://graph.microsoft.com/oidc/userinfo"
            op.endsession_endpoint: "https://login.microsoftonline.com/<Directory (tenant) ID>/oauth2/v2.0/logout"
            rp.post_logout_redirect_uri: "KIBANA_ENDPOINT_URL/logged_out"
            op.jwkset_path: "https://login.microsoftonline.com/<Directory (tenant) ID>/discovery/v2.0/keys"
            claims.principal: email
            claim_patterns.principal: "^([^@]+)@YOUR_DOMAIN\\.TLD$"
Where:
<Application (client) ID>is your Client ID, available in the application details on Azure.<Directory (tenant) ID>is your Directory ID, available in the application details on Azure.KIBANA_ENDPOINT_URLis your Kibana endpoint.YOUR_DOMAINandTLDin theclaim_patterns.principalregular expression are your organization email domain and top level domain.
If you're using Elastic Cloud Enterprise or Elastic Cloud Hosted, and you're using machine learning or a deployment with hot-warm architecture, you must include this configuration in the user settings section for each node type.
Create a role mapping.
The following role mapping for OIDC restricts access to a specific user
(firstname.lastname)based on theclaim_patterns.principalemail address. This prevents other users on the same domain from having access to your deployment. You can remove the rule or adjust it at your convenience.More details are available in our Configuring role mappings documentation.
POST /_security/role_mapping/oidc_kibana
{
    "enabled": true,
    "roles": [ "superuser" ],
    "rules" : {
      "all" : [
        {
          "field" : {
            "realm.name" : "oidc1"
          }
        },
        {
          "field" : {
            "username" : [
              "<firstname.lastname>"
            ]
          }
        }
      ]
    },
    "metadata": { "version": 1 }
}
If you use an email in the
claim_patterns.principal, you won’t need to add the domain in the role_mapping (for example,firstname.lastname@your_domain.tldshould befirstname.lastname).Configure Kibana with the OIDC realm. Update your Kibana user settings with the following configuration:
xpack.security.authc.providers:
    oidc.oidc1:
    order: 0
    realm: oidc1
    description: "Log in with Azure"
    basic.basic1:
    order: 1
Follow these steps to configure OpenID Connect single sign-on on in Elasticsearch with a Google OP.
For more information about OpenID connect in Google, refer to Google OpenID Connect documentation.
Configure the OAuth client ID.
Create a new project:
- Sign in to the Google Cloud and open the New Project page. Create a new project.
Create a client ID and secret:
Navigate to the APIs & Services and open the Credentials tab to create your OAuth client ID.
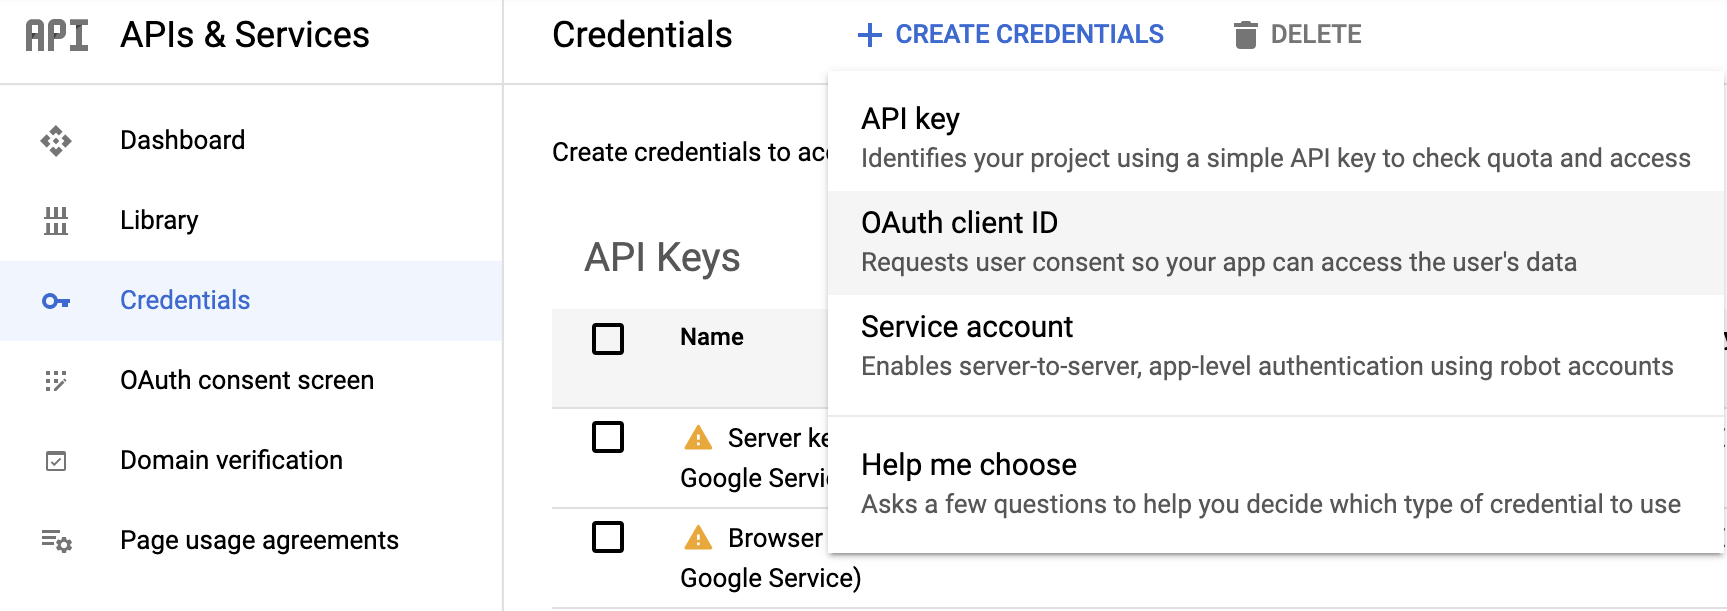
For Application Type choose
Web application.Choose a Name for your OAuth 2 client, for example
ec-oauth2.Add an Authorized redirect URI.
It will typically be
<KIBANA_ENDPOINT_URL>/api/security/oidc/callback, where<KIBANA_ENDPOINT_URL>is the base URL for your Kibana instance.If you're using Elastic Cloud Hosted, then set this value to
<KIBANA_ENDPOINT_URL>/api/security/oidc/callback.Select Create and copy your client ID and your client secret for later use.
Add your client secret to the Elasticsearch keystore.
For OIDC, the client secret setting name in the keystore should be in the form
xpack.security.authc.realms.oidc.<oidc-realm-name>.rp.client_secret.Configure Elasticsearch with the OIDC realm.
To learn more about the endpoints provided by Google, refer to this OpenID configuration.
To configure Elasticsearch for OIDC, update your Elasticsearch user settings with the following configuration:
xpack:
    security:
    authc:
        realms:
        oidc:
            oidc1:
            order: 2
            rp.client_id: "YOUR_CLIENT_ID"
            rp.response_type: "code"
            rp.requested_scopes: ["openid", "email"]
            rp.redirect_uri: "<KIBANA_ENDPOINT_URL>/api/security/oidc/callback"
            op.issuer: "https://accounts.google.com"
            op.authorization_endpoint: "https://accounts.google.com/o/oauth2/v2/auth"
            op.token_endpoint: "https://oauth2.googleapis.com/token"
            op.userinfo_endpoint: "https://openidconnect.googleapis.com/v1/userinfo"
            op.jwkset_path: "https://www.googleapis.com/oauth2/v3/certs"
            claims.principal: email
            claim_patterns.principal: "^([^@]+)@YOUR_DOMAIN\\.TLD$"
Where:
YOUR_CLIENT_IDis your Client ID.<KIBANA_ENDPOINT_URL>/api/security/oidc/callbackis your Kibana endpoint.It will typically be
<KIBANA_ENDPOINT_URL>/api/security/oidc/callback, where<KIBANA_ENDPOINT_URL>is the base URL for your Kibana instance.If you're using Elastic Cloud Hosted, then set this value to
<KIBANA_ENDPOINT_URL>/api/security/oidc/callback.YOUR_DOMAINandTLDin theclaim_patterns.principalregular expression are your organization email domain and top level domain.
If you're using Elastic Cloud Enterprise or Elastic Cloud Hosted, and you're using machine learning or a deployment with hot-warm architecture, you must include this configuration in the user settings section for each node type.
Create a role mapping.
The following role mapping for OIDC restricts access to a specific user
(firstname.lastname)based on theclaim_patterns.principalemail address. This prevents other users on the same domain from having access to your deployment. You can remove the rule or adjust it at your convenience.More details are available in our Configuring role mappings documentation.
POST /_security/role_mapping/oidc_kibana
{
    "enabled": true,
    "roles": [ "superuser" ],
    "rules" : {
      "all" : [
        {
          "field" : {
            "realm.name" : "oidc1"
          }
        },
        {
          "field" : {
            "username" : [
              "<firstname.lastname>"
            ]
          }
        }
      ]
    },
    "metadata": { "version": 1 }
}
If you use an email in the
claim_patterns.principal, you won’t need to add the domain in the role_mapping (for example,firstname.lastname@your_domain.tldshould befirstname.lastname).Configure Kibana with the OIDC realm. Update your Kibana user settings with the following configuration:
xpack.security.authc.providers:
    oidc.oidc1:
    order: 0
    realm: oidc1
    description: "Log in with Google"
    basic.basic1:
    order: 1
Follow these steps to configure OpenID Connect single sign-on on for Elasticsearch with an Okta OP.
For more information about OpenID connect in Okta, refer to Okta OAuth 2.0 documentation.
Configure the OAuth client ID.
Create a new application:
Go to Applications > Add Application.
For the Platform page settings, select Web then Next.
In the Application settings choose a Name for your application, for example
Kibana OIDC.Set the Base URI to
KIBANA_ENDPOINT_URL.Set the Login redirect URI.
It will typically be
<KIBANA_ENDPOINT_URL>/api/security/oidc/callback.If you're using Elastic Cloud Hosted, then set this value to
<KIBANA_ENDPOINT_URL>/api/security/oidc/callback.Set the Logout redirect URI as
KIBANA_ENDPOINT_URL/logged_out.Choose Done and copy your client ID and client secret values for later use.
Add your client secret to the Elasticsearch keystore.
For OIDC, the client secret setting name in the keystore should be in the form
xpack.security.authc.realms.oidc.<oidc-realm-name>.rp.client_secret.Configure Elasticsearch with the OIDC realm.
To learn more about the available endpoints provided by Okta, refer to the following OpenID configuration:
https://{{yourOktadomain}}/.well-known/openid-configurationTo configure Elasticsearch for OIDC, update your Elasticsearch user settings with the following configuration:
xpack:
    security:
    authc:
        realms:
        oidc:
            oidc1:
            order: 2
            rp.client_id: "YOUR_CLIENT_ID"
            rp.response_type: "code"
            rp.requested_scopes: ["openid", "email"]
            rp.redirect_uri: "KIBANA_ENDPOINT_URL/api/security/oidc/callback"
            op.issuer: "https://YOUR_OKTA_DOMAIN"
            op.authorization_endpoint: "https://YOUR_OKTA_DOMAIN/oauth2/v1/authorize"
            op.token_endpoint: "https://YOUR_OKTA_DOMAIN/oauth2/v1/token"
            op.userinfo_endpoint: "https://YOUR_OKTA_DOMAIN/oauth2/v1/userinfo"
            op.endsession_endpoint: "https://YOUR_OKTA_DOMAIN/oauth2/v1/logout"
            op.jwkset_path: "https://YOUR_OKTA_DOMAIN/oauth2/v1/keys"
            claims.principal: email
            claim_patterns.principal: "^([^@]+)@YOUR_DOMAIN\\.TLD$"
Where:
YOUR_CLIENT_IDis the Client ID that you set up in the previous steps.KIBANA_ENDPOINT_URLis your Kibana endpoint, available from the Elastic Cloud Console.YOUR_OKTA_DOMAINis the URL of your Okta domain shown on your Okta dashboard.YOUR_DOMAINandTLDin theclaim_patterns.principalregular expression are your organization email domain and top level domain.
Remember to add this configuration for each node type in the User settings if you use several node types based on your deployment architecture (Dedicated Master, High IO, and/or High Storage).
Create a role mapping.
The following role mapping for OIDC restricts access to a specific user
(firstname.lastname)based on theclaim_patterns.principalemail address. This prevents other users on the same domain from having access to your deployment. You can remove the rule or adjust it at your convenience.More details are available in our Configuring role mappings documentation.
POST /_security/role_mapping/oidc_kibana
{
    "enabled": true,
    "roles": [ "superuser" ],
    "rules" : {
      "all" : [
        {
          "field" : {
            "realm.name" : "oidc1"
          }
        },
        {
          "field" : {
            "username" : [
              "<firstname.lastname>"
            ]
          }
        }
      ]
    },
    "metadata": { "version": 1 }
}
If you use an email in the
claim_patterns.principal, you won’t need to add the domain in the role_mapping (for example,firstname.lastname@your_domain.tldshould befirstname.lastname).Configure Kibana with the OIDC realm. Update your Kibana user settings with the following configuration:
xpack.security.authc.providers:
    oidc.oidc1:
    order: 0
    realm: oidc1
    description: "Log in with Okta"
    basic.basic1:
    order: 1