Map custom data to ECS
Elastic Stack Serverless
A common schema helps you correlate and use data from various sources.
Fields for most Elastic modules and solutions (version 7.0 and later) are mapped to the Elastic Common Schema. You may want to map data from other implementations to ECS to help you correlate data across all of your products and solutions.
Before you start a conversion, be sure that you understand the basics below.
Make sure you understand the distinction between Core and Extended fields, as explained in the Guidelines and Best Practices.
Core and Extended fields are documented in the ECS Field Reference or, for a single page representation of all fields, please see the generated CSV of fields.
Here’s the recommended approach for converting an existing implementation to ECS.
Review each field in your original event and map it to the relevant ECS field.
- Start by mapping your field to the relevant ECS Core field.
- If a relevant ECS Core field does not exist, map your field to the relevant ECS Extended field.
- If no relevant ECS Extended field exists, consider keeping your field with its original details, or possibly renaming it using ECS naming guidelines and attempt to map one or more of your original event fields to it.
Review each ECS Core field, and attempt to populate it.
- Review your original event data again
- Consider populating the field based on additional meta-data such as static information (e.g. add
event.category:authenticationeven if your auth events don’t mention the word "authentication") - Consider capturing additional environment meta-data, such as information about the host, container or cloud instance.
Review other extended fields from any field set you are already using, and attempt to populate it as well.
Set
ecs.versionto the version of the schema you are conforming to. This will allow you to upgrade your sources, pipelines and content (like dashboards) smoothly in the future.
Using a spreadsheet to plan the migration from pre-existing source fields to ECS is a common practice. It’s a good way to address each of your fields methodically among colleagues.
To help you plan your migration, Elastic offers a spreadsheet template. You can use a CSV version of this spreadsheet to automatically create an Elasticsearch ingest pipeline. This is the easiest and most consistent way to map your custom data to ECS, regardless of your ingest method.
Use Kibana's Create pipeline from CSV feature to create an Elasticsearch ingest pipeline from a CSV file that maps custom data to ECS fields.
Before you start, ensure you meet the prerequisites to create ingest pipelines in Kibana.
- Download or make a copy of the spreadsheet template.
- Use the spreadsheet to map your custom data to ECS fields. While you can include additional columns, Kibana only processes the following supported columns. Other columns are ignored.
Supported columns
source_field- (Required) JSON field key from your custom data. Supports dot notation. Rows with an empty
source_fieldare skipped. destination_field- (Required) ECS field name. Supports dot notation. To perform a
format_actionwithout renaming the field, leavedestination_fieldempty.
If the destination field is @timestamp, a format_action of parse_timestamp and a timestamp_format of UNIX_MS are used, regardless of any provided values. This helps prevent downstream conversion problems.
format_action- (Optional) Conversion to apply to the field value.
Valid values
- (empty)
- No conversion.
parse_timestamp- Formats a date or time value. To specify a format, use
timestamp_format. to_array- Converts to an array.
to_boolean- Converts to a boolean.
to_float- Converts to a floating point number.
to_integer- Converts to an integer
to_string- Converts to a string.
lowercase- Converts to lowercase.
uppercase- Converts to uppercase.
timestamp_format- (Optional) Time and date format to use with the
parse_timestampformat action. Valid values areUNIX,UNIX_MS,ISO8601,TAI64N, and [Java time patterns](/ elasticsearch/docs/reference/elasticsearch/mapping-reference/mapping-date-format.md). Defaults toUNIX_MS. copy_action- (Optional) Action to take on the
source_field. Valid values are:
Valid values
- (empty)
- (Default) Uses the default action. You’ll specify the default action later on Kibana's Create pipeline from CSV page.
copy- Makes a copy of the
source_fieldto use as thedestination_field. The final document contains both fields. renameRenames the
source_fieldto thedestination_field. The final document only contains thedestination_field.
Save and export your spreadsheet as a CSV file.
NoteKibana's Create pipeline from CSV feature only supports CSV files up to 100 MB.
In Kibana, open the main menu and click Stack Management > Ingest Pipelines > Create pipeline > New pipeline from CSV.
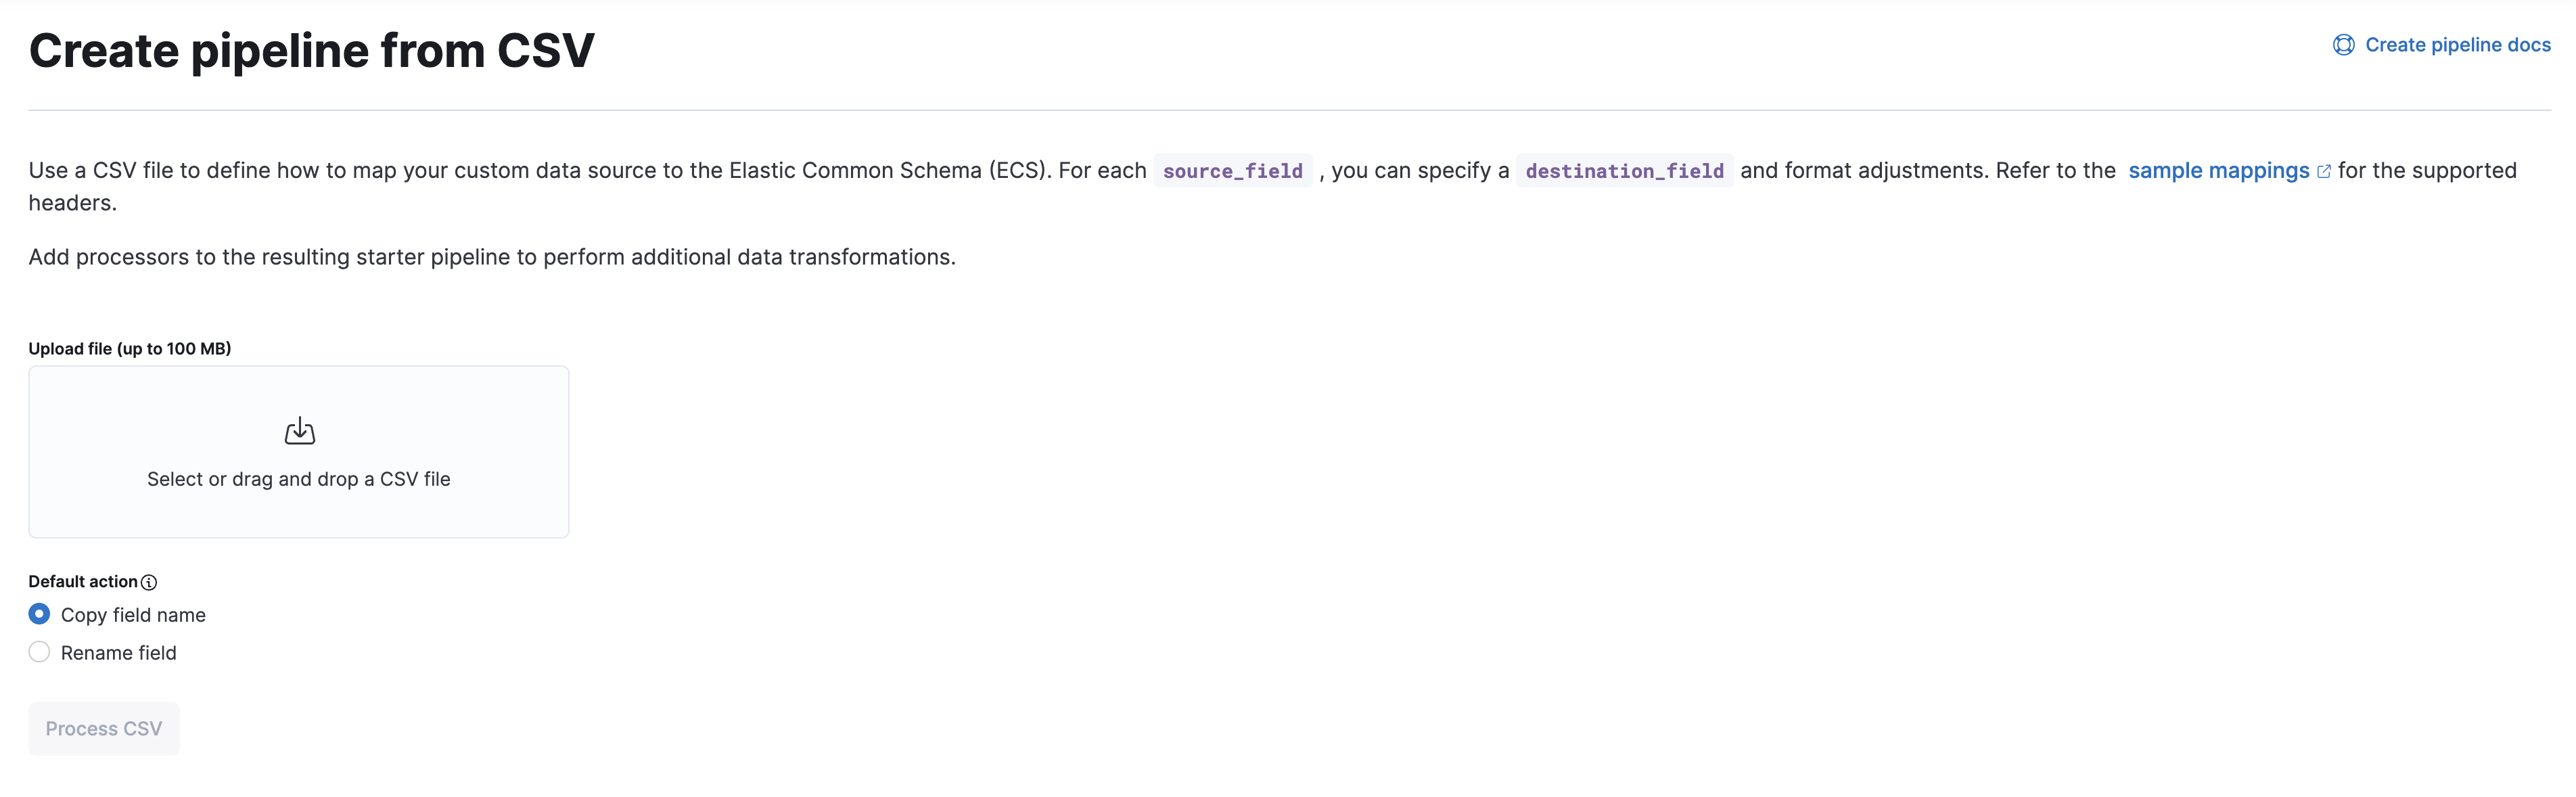
On the Create pipeline from CSV page, upload your CSV file.
Under Default action, select the Copy field name or Rename field option.
For the Copy field name option, Kibana makes a copy of the
source_fieldto use as thedestination_fieldby default. The final document contains both fields.For the Rename field option, renames the
source_fieldto thedestination_fieldby default. The final document only contains thedestination_field.You can override this default using the
copy_actioncolumn of your CSV.Click Process CSV.
Kibana displays a JSON preview of the ingest pipeline generated from your CSV file.
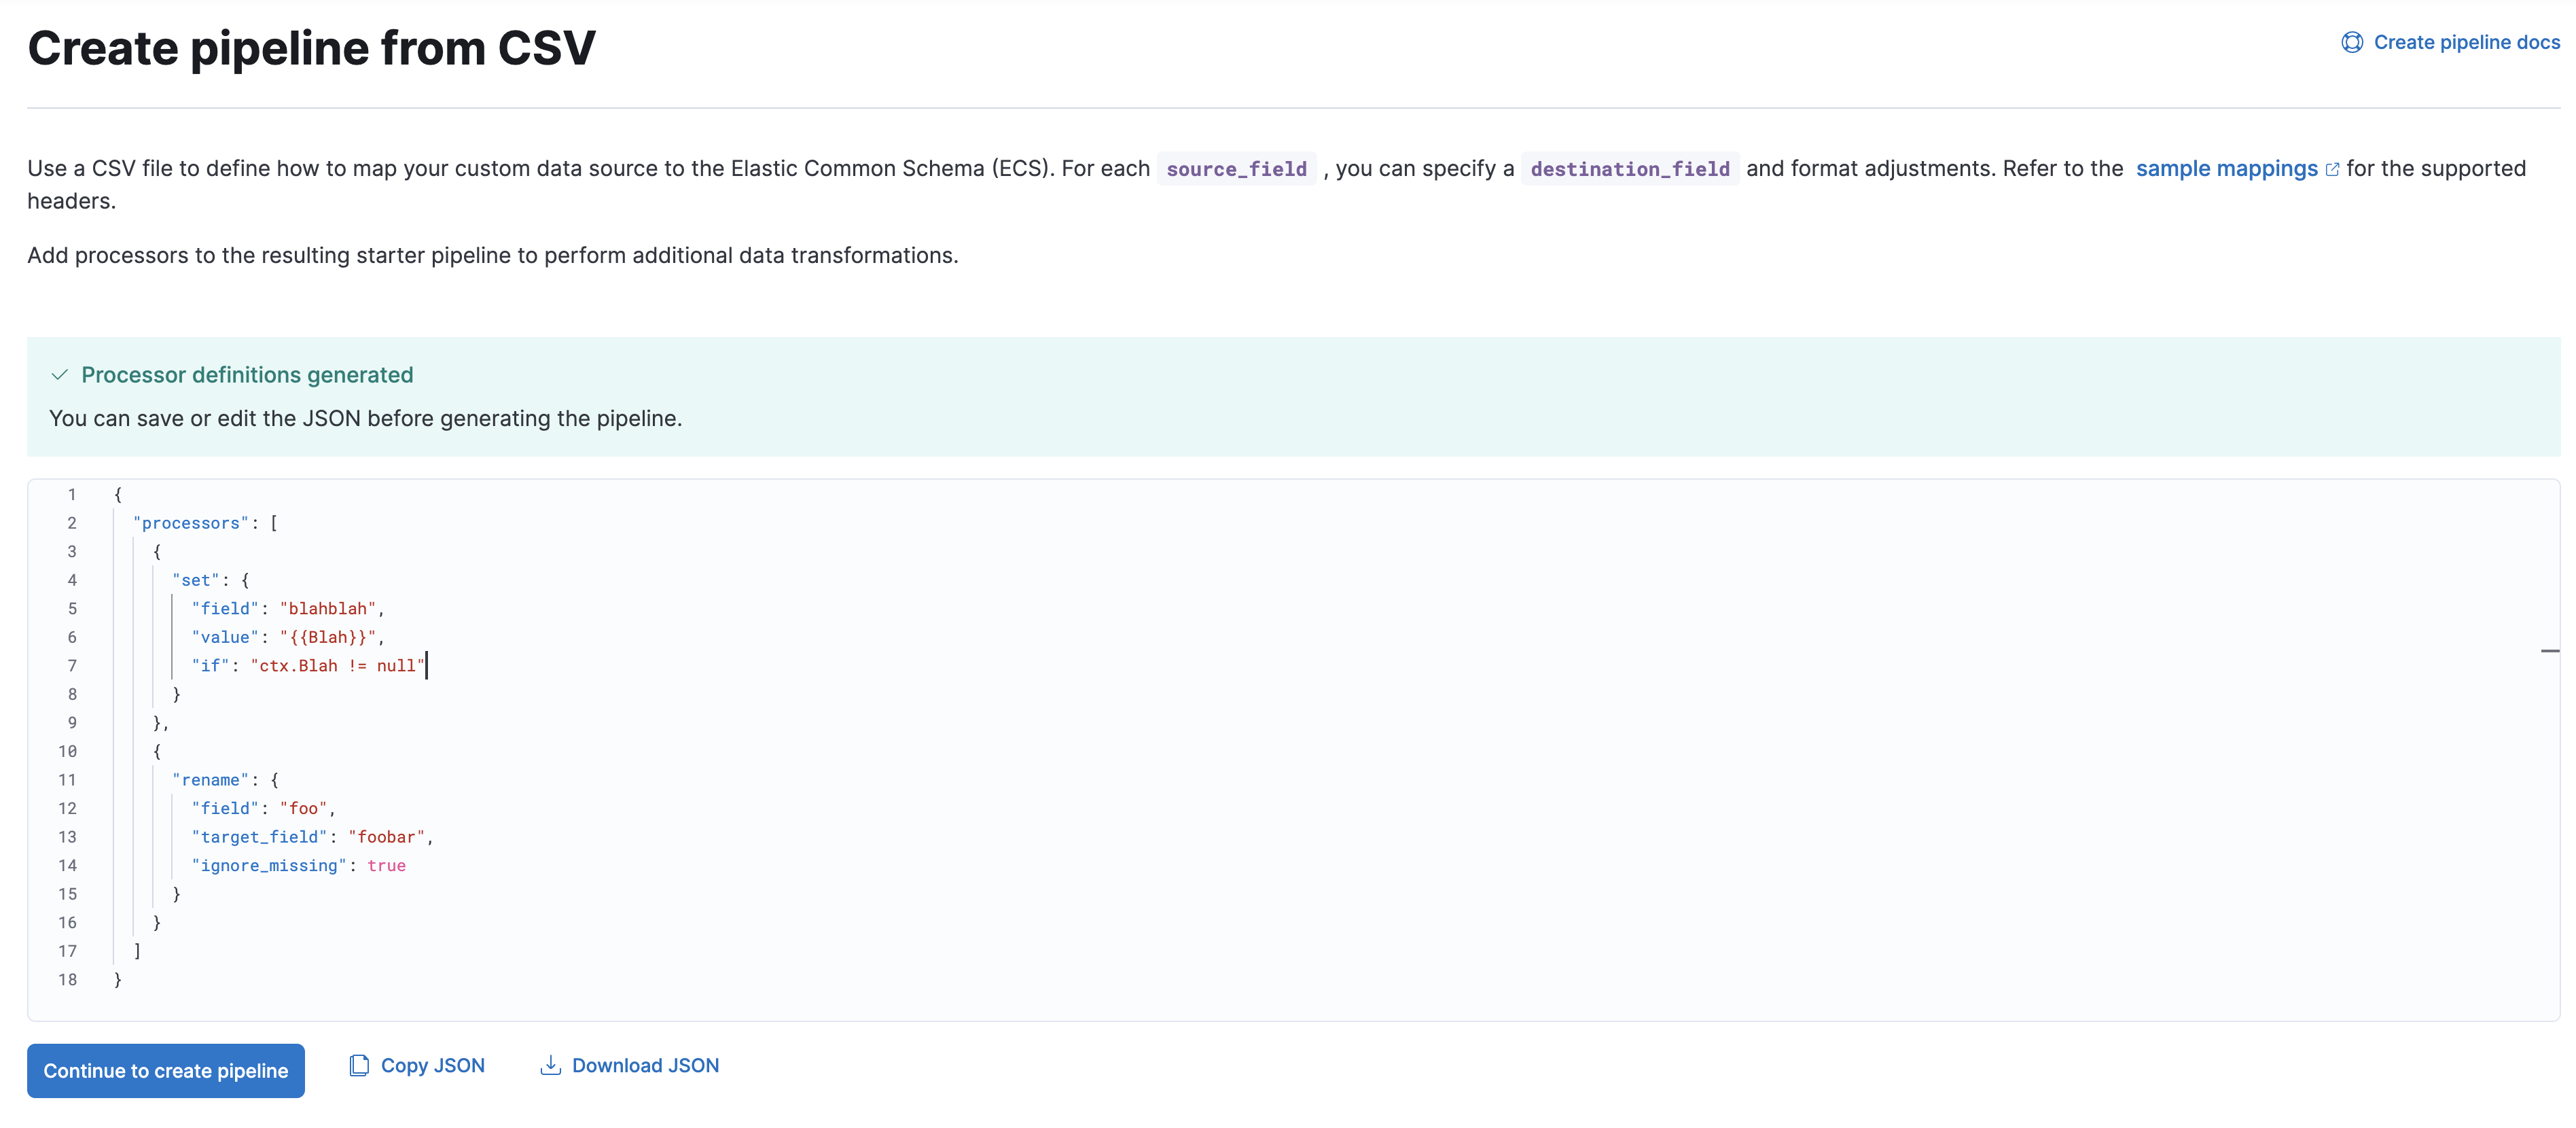
To create the pipeline, click Continue to create pipeline.
On the Create pipeline page, you can add additional ingest processors to your pipeline.
When you’re done, click Create pipeline.